Author: Kephren

  • Knitting Patterns and Copyright

    Knitting Patterns and Copyright

    The broadest Creative Commons license is Attribution (CC BY). It grants users all of the same rights as the original creator, as long as the creator is given credit for creating the original work. All CC licenses begin with and include Attribution, but limit the user’s’ rights to share, adapt, or profit from the work in some way.

    The Attribution-ShareAlike license (CC BY-SA), allows adaptations and commercial use, but requires all users to share their work with the same license as the original.

    The Attribution-NonCommercial license (CC BY-NC), allows adaptations but prohibits users from using the work or any derivatives for profit or other commercial purposes.

    The Attribution-NoDerivatives license (CC BY-ND) limits users ability to change or adapt the work except for personal use, but the license does not restrict the user’s rights to distribute the work, including for sale or for other commercial purposes.

    The Attribution-NonCommercial ShareAlike license (CC BY-NC-SA) grants the right to adapt the work provided it is shared with the same license. This license does not allow users to profit from or otherwise use their adaptations commercially.

    The Attribution-NonCommercial No-Derivatives license (CC BY-NC-ND) grants only the right to use the work and does not allow adaptations, derivatives, or commercial use.

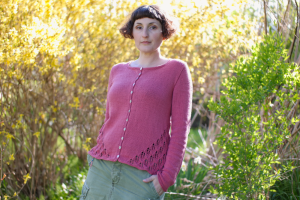
    What license might a knit designer use if they are offering a pattern for free? Susanna IC has a copyright notice on her website. The license for all her free patterns is CC BY-NC, so users can adapt and share the work with attribution, but not for profit or other commercial purposes.[2] She retains the copyright for all her paid patterns.

    Another knit designer, Laura Semesky, has granted users the CC BY-NC-SA license for her Winter Is Coming scarf pattern, which allows users to use and adapt the work non-commercially as long as they credit the designer and share the adaptations with the same license as the original.[3]

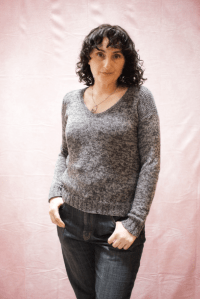
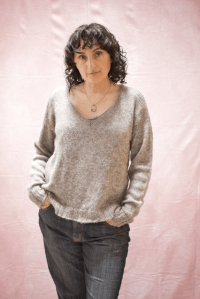
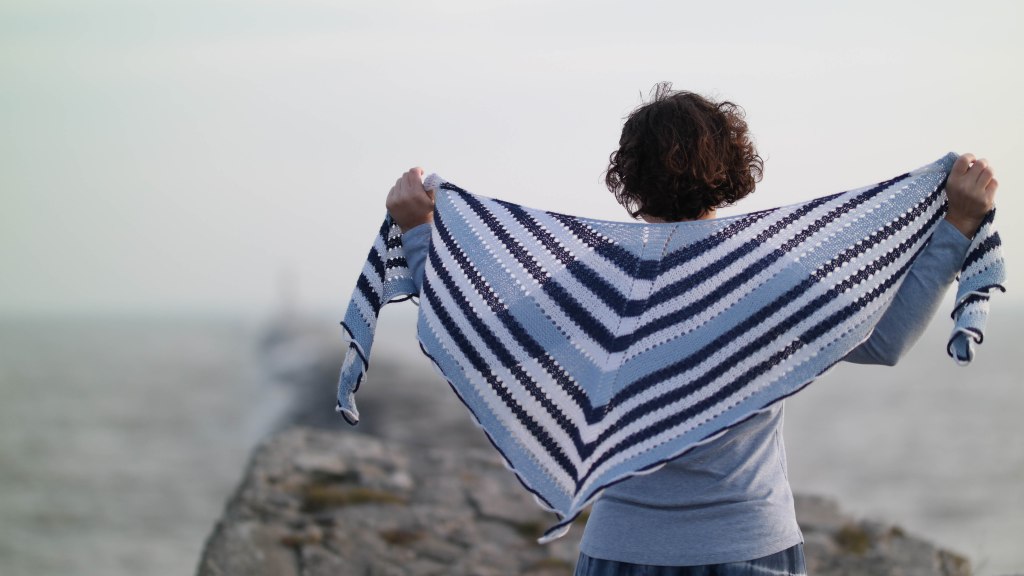
    I have just amended my free Voyager Shawl pattern to have the CC BY-NC-SA license also. I developed this pattern the same way as all my others, with tech editing and test knitting, but I made it free so people could see an example of my work in my portfolio.

    There are a lot of free knitting patterns available, but many of them don’t use Creative Commons licenses. This could be because the designers are unaware of these licenses, but we shouldn’t assume so. The designers may just want to retain all their rights as the copyright holder.

    Some designers use free patterns to drive traffic to their websites, or as a thank you for signing up for their mailing list, both commercial purposes that are protected by copyright.

    With the large number of free knitting patterns on the internet it’s important that knitting pattern creators and users understand copyright and Creative Commons licenses. Check out the Creative Commons website to find out more.


    [1] Office, U. C. (n.d.). What is Copyright? | U.S. Copyright Office. https://www.copyright.gov/what-is-copyright/

    [2] ArtQualia | Designs by Susanna IC | Copyright Notice. artqualia.com/copyright%20notice.html.

    [3] “Winter Is Coming Pattern by Laura Semesky.” Ravelry, http://www.ravelry.com/patterns/library/winter-is-coming-9.

  • Welcome!

    Welcome!

    In 2014 I launched kephrenknittingstudio.com. I was just beginning to write my knit designs into patterns and I needed a home on the web to promote my work. Later, I added my tech editing services page to connect with my tech editing clients as that side of my business grew. Over the years I blogged about my design work and knitting techniques for both knitters and designers, but for the last few years I have felt constrained by my old website. I want my new website to encompass more of my creative interests, including knitting and sewing my clothes, writing, and photography, but I also want it to reflect my values in sustainable fashion and mental health.

    In 2022 I published my last knitting pattern, the Dappled Sky pullover. The knitting pattern publishing business is always changing, and in the last few years many knitting magazines and print publishers have shut down. When I started designing it was always with the goal of learning the industry from the knit designer’s perspective in order to become a better tech editor. With the current changes in the industry I have decided to focus on tech editing and leave designing to my clients.

    In 2022 I started renting my studio space at The Art Garage in Green Bay. Kephren Knitting Studio had always been a virtual space, but with my new interest in sewing I needed more room to work and to store my supplies. Renting my space also supports a local nonprofit that gives artists a way to display their work and makes art classes available to the community. For the first year I was there I focused on learning to sew clothes for myself using simple patterns and discounted fabric. Then in 2023 I started experimenting with upcycling–salvaging fabric from thrifted clothes and altering patterns to get the exact shape and fit that I want. I am excited to share my creations on this new blog!

    In 2023 I went back to college. In the early 2000s I had started a BA in Linguistics, but because of my mental health I had to drop out before I finishing it. I started thinking about college again in 2021 when I was diagnosed with PTSD and finally started to get the mental healthcare I needed. When the local university added a technical and professional writing emphasis to their BFA program in writing I was sold. I started taking classes in Summer of 2023 and I expect to graduate with a BFA in Writing and Applied Arts, with an emphasis in Professional and Technical Writing in Spring of 2025.

    I am excited to share all my new adventures in photography, writing, knitting, and sewing on this blog, and to hear about yours as well!

    Thank you for reading.

  • Knitting Seamless Sweaters; Four Construction Methods

    Knitting Seamless Sweaters; Four Construction Methods

    I have been a seamless knitter from the start, and I’ve often heard statements like “seams add structure” and “seamless knits will stretch out of shape.” As with most things, it depends. If you knit a garment at a loose gauge in a yarn with no memory it will probably stretch out of shape with or without seams. If structure and rigidity are what you want, hand knitting may not be the best method for creating your garment. Although you can create knit fabrics with more structure by working stranded colorwork or a slip-stitch pattern at a dense gauge, you may consider creating your garment out of a stiff woven fabric instead.

    Knit fabric is very flexible and fluid and can be shaped 3-dimensionally as the fabric is created. Rather than seeing the flexible property of knit fabric as an obstacle to overcome, I look at it as an advantage to be utilized. Knit fabric looks the same whether it is worked flat or circularly (unlike crocheted fabric) and pieces can be joined invisibly (unlike woven fabric). Seams alone will not make knit fabric behave like woven fabric, but it’s not true either that seamless knits will always stretch out of shape over time. Well-fitting, thoughtfully constructed knit garments will be both comfortable and flattering for years of wear, and constructing whole garments without a single seam is like magic!

    The most crucial aspect of garment construction is the way the sleeves fit into the shoulders of a garment. This section of a garment can be referred to as the yoke, regardless of construction. Most construction methods can be worked seamlessly from the top down or the bottom up, simply by swapping increases for decreases. The main types of shoulder and sleeve constructions are: drop shoulder, raglan, round yoke, and set-in sleeve. In this post I’ve listed the characteristics of each one, and common problems to look out for when knitting and designing them.

    Raglans

    Raglan yokes have a characteristic diagonal line between the shoulder and sleeve join. Although top-down raglans have become very popular, raglans can also be made seamlessly from the bottom up, or in pieces and seamed. It’s the diagonal join that makes it a raglan. The standard increase or decrease rate for a raglan yoke is 8 stitches every 2 rows or rounds; 2 stitches at every raglan line. This ratio works well for sizes with a chest circumference of around 40″/100 cm but will result in armholes that are too deep and neck circumferences that are too wide in larger sizes. Smaller sizes can have the opposite problem. To create a better fitting raglan a faster rate of increase, like 12 or 16 stitches for every 2 rows/rounds, can be used at the top to ease over the shoulders and at the bottom to curve around the underarms. If your size does not fall in the middle of the size range look for this type of saddle/raglan hybrid for a better fitting sweater.

    Round Yokes

    This is a great construction for people with a non-standard bust-to-upper-arm ratio because there is no distinction between body and sleeves until the bottom of the yoke. Stitches can be borrowed from the body and moved to the sleeves for larger arms, or vice versa to accommodate a larger bust. Round yokes are shaped with several sets of increase or decrease rows or rounds, or sometimes in wedges. The shaping rounds should be more frequent near the neck opening to accommodate the width of the shoulders, with most of the shaping rounds occurring in the top half of the yoke. If the shaping rounds are evenly distributed throughout the yoke it will result in a cone-shaped yoke, causing the sweater to ride up at the neck because the circumference of the fabric isn’t large enough to fit around the shoulders.

    Drop Shoulders

    The drop shoulder is a really simple construction that’s great for oversized or unisex sweaters. The shoulder line is meant to fall at the upper arm, not the shoulder break, so this style will work well for people with broad or narrow shoulders without any adjustments. One problem you might encounter with this style is sleeves that are either too long or too short. The top of the yoke forms part of the sleeve, so the length of the sleeve depends on how far down the arm the shoulder extends. Knitting the sleeves directly onto the sweater by picking up stitches around the armhole allows the sweater to be tried on and the sleeve length adjusted for a perfect fit.

    Set-In Sleeves

    Set-in sleeve construction follows the shape of the body more than the other styles. To get a really good fit the line where the sleeve is set into the shoulder should fall right at the shoulder break; where the shoulder bends when you extend your arm to the side. Because of this, it’s best to choose your size based on your shoulder width rather than chest circumference, and then make adjustments for the difference. Casting on extra stitches at the front neck when working from the top down, or decreasing additional stitches at the front neck when working from the bottom up can create extra fabric at the chest to accommodate a larger bust and narrow shoulders.

    Seamless set-in sleeve yokes can be worked in one piece from the bottom up or top down using decreases or increases to shape the sleeve cap and armhole simultaneously, or the front and back of the yoke can be shaped first with stitches picked up around the armholes and shaped with short rows to create the sleeve caps. Both methods can create a set-in sleeve yoke with a smooth shoulder and sleeve join that follows the curve of the shoulder joint and the underarm.

    I hope that this overview will inspire you to create seamless sweaters that fit your unique body shape and proportions, and embrace the inherent properties of knit fabric! What is your favorite sweater construction? Is there a particular modification that you always make to help your sweaters fit better? Please leave a comment!

    Thank you for knitting!

  • The Side-to-Side Join

    The Side-to-Side Join

    When knitting cardigans, stitches are often picked up and worked onto the front edges of the sweater for the button bands and button hole bands. Perfectly serviceable bands are created this way, and if care is taken to pick up the correct amount of stitches and work at the right gauge, the bands will work, but there are a few things that can go wrong. The bands may pucker (too few stitches picked up) or flare (too many stitches picked up). Ribbing, seed stitch, and garter stitch, all excellent band choices for their non-curling properties, have a tendency to spread width wise, which can cause perpendicular bands to droop.

    One way to avoid all of these problems is by working the bands in the same direction as the body of the sweater, parallel to the fronts. The same number of rows can be worked on the band as there are on the front of the cardigan, but at a tighter gauge, giving the bands just the right amount of stretch. Seed stitch, ribbing, and garter stitch are given a firm vertical tug, keeping their width-wise spread in check. A different color can be used, or even a different yarn. Bands like this are often sewn on, or sometimes stitches are picked up along the sweater fronts and bound off as the band is attached.  I think the side-to-side join is the neatest and easiest way to attach parallel front bands, but I rarely see it used, so I’ve illustrated the technique in steps below.

    Setup: Start by casting on the number of stitches needed for your band. Double pointed needles or short straight needles 1 or 2 sizes smaller than the needles used for the body of the sweater will work best.

    SAMSUNG CAMERA PICTURES

    Step 1: Insert the needle into the edge of your cardigan from front to back.

    SAMSUNG CAMERA PICTURES

    Step 2: Pull a loop through.SAMSUNG CAMERA PICTURES

    Step 3: Remove the loop from the needle and pull out enough yarn to comfortably knit the next 2 rows. The excess length will be removed later so this does not need to be exact.SAMSUNG CAMERA PICTURES

    Step 4: Work the first wrong-side row of the band with the bottom half of the loop.SAMSUNG CAMERA PICTURES

    Step 5: Work the second right-side row of the band with the top half of the loop and pull tight so the band is snugged up against the front.SAMSUNG CAMERA PICTURES

    Repeat steps 1 through 5 for the length of the fronts. Two rows are worked for every picked-up loop, so you will have to skip every second row on the sweater front for the band to have the same number of rows. If you are working a round neck cardigan, both bands can be worked first and continued into the neck band. For v-neck cardigans, the bands can continue around the neck edge to be joined at the back neck.

    Cardigans aren’t the only use for the side-to-side join! Anywhere you would would like to attach a parallel piece of knitting to an already finished piece this method will work. The cover photo and the photos below are examples of sweaters that I made using this technique.

    Garter stitch bands.
    Garter stitch bands.

    From the wrong side you can see hoe the band continues into the collar.
    The wrong side view, Here you can see how the band continues into the collar.

    Seed stitch bands.
    Seed stitch bands.

    The wrong side view.
    From the inside.

    SAMSUNG CAMERA PICTURES
    Knit 1, purl 1 ribbing seen from the right side on the left and the wrong side on the right.

    Let me know in the comments if you’ve seen this method before or if you’ve tried it yourself.

    Thank you for knitting!

  • Ease

    Ease

    What Is Ease?

    Ease is the term used to describe the difference between the size of a garment and the size of the body the garment is intended to fit. There are two types of ease used in garment design–wearing ease and design ease. Wearing ease is necessary for movement in places like the underarm and elbow. Whether the garment is designed to wear over other clothing or just undergarments will also help to determine how much wearing ease is needed. Design ease determines the shape and fit of a garment. A batwing sweater will have a lot of ease at the underarm and chest while a set-in sleeve sweater will usually have only a small amount of ease. In a bulky sweater the thickness of the fabric will take up some of the ease between the outer circumference of the sweater and the circumference of the body. Some garments can be worn with negative ease for a form-following fit because of the inherent stretch of knit fabric.

    Some general guidelines regarding ease and fit:

    • Very close fit – 0 to 2″/5 cm negative ease
    • Close fit – 0 to 2″/5 cm positive ease
    • Standard fit – 2 to 4″/5 to 10 cm positive ease
    • Loose fit – 4 to 6″/10 to 15 cm positive ease
    • Oversized fit- 6″/15 cm or more positive ease
    Augusta is a cocoon-style cardigan with a lot of design ease at the underarm.
    Kephren wearing the Spring Thaw Cardigan with zero ease
    The Spring Thaw Cardigan is a set-in sleeve sweater worn with zero ease at the bust.

    How To Determine Your Preferred Ease

    Ease is ultimately a matter of personal preference. Some people like to wear their sweaters with a lot of ease and others prefer no ease at all. The amount of ease suggested in a pattern is just a suggestion, based on a theoretical range of body sizes. Every knitter will not fit neatly into one of these sizes. When I am grading a knitting pattern I apply the same amount of intended ease to each size to maintain a consistent fit across the size range, but the amount of ease the garment is worn with is ultimately up to the knitter. Hand knitting is wonderfully customizable, and knitters can choose the amount of ease they prefer. An evenly graded size range, a schematic, and finished measurements will make it easier for knitters to achieve the fit they want.

    To determine how much ease you prefer, measure the width of a sweater that you like the fit of at the bust/chest and multiply the width by 2 to get the circumference. Then measure your body around the fullest part of your bust/chest. Subtract your body measurement from the sweater measurement. This is your preferred ease and corresponds to the suggested ease given in a pattern. If a pattern suggests 6″ to 8″/15 to 20 cm of ease but you know from your measurements that you prefer 2″/5 cm of ease, you may want to knit one size smaller than suggested for your chest measurement.

    It’s also important to get the right amount of ease at the upper arm. Measure the width of your sweater’s sleeve just below the underarm and multiply by 2 to get the circumference, then measure around your arm just below the underarm. Subtract your arm measurement from the sweater measurement to determine how much ease you like in your sleeves. Now look at the upper arm circumference of the pattern size you chose. If the pattern’s sleeve circumference is the same as your well-fitting sweater, that’s perfect! If the upper sleeve circumference is different from your preferred sleeve circumference you may want to choose a different size or adjust the circumference of the sleeve. Negative ease in the sleeves will make them ill-fitting and uncomfortable.

    The Lake Geneva Sweater shown in size 35 1/4″/89.5 cm and worn with 2″/5 cm negative ease.
    The Lake Geneva Sweater shown in size 43 3/4″/111 cm and worn with 6″/15 cm positive ease.

    Ease and Bust Size

    You can see from my two versions of the Lake Geneva Sweater above that the same garment can look very different depending on the amount of ease it’s worn with. Ease is calculated at the full bust, so the size of your bust relative to the rest of your torso will also affect the amount of ease in your garment. My high bust measurement (measured around my chest just below the underarms) is 34 1/2″/87.5 cm and my full bust is 38″/96.5 cm. The smaller version, worn with negative ease at the bust, still has some positive ease in the sleeves and body because my full bust is 3 1/2″/9 cm larger than my high bust, and most standard women’s size charts assume a B cup, or a full bust 2″/5 cm larger than your high bust. If you wear a C or D cup, or your full bust is 3″ to 4″/7.5 to 10 cm larger than your high bust, you may need less ease at the full bust to achieve your preferred fit everywhere else. If your cup size is larger than DD or 5″/12.5 cm larger than your high bust, you may wish to make a smaller size than recommended to fit the rest of your body and add extra fabric at the bust only with additional rows or stitches in the front of the garment.

    The Relative Ease Fallacy

    There have been some discussions recently about whether larger people need to have more ease in their garments to achieve the same look and fit as smaller people wearing the same type of garment. I think this idea is based on false assumptions and a misunderstanding of geometry. Remember, ease is the difference between the body measurement and the garment measurement. If the same amount of ease is applied to each size in the range, the difference between the body and garment measurements will remain the same.

    Two pairs of circles demonstrating how ease remains the same when applied consistently. A 34"/86.5 cm circle within a 38"/96.5 cm circle has a 0.6"/1.6 cm radius difference, and a 54"/137 cm circle within a 58"/147 cm circle also has a 0.6"/1.6 cm radius difference.

    The two pairs of circles above illustrate what happens when the same amount of ease is applied to two different size garments. Imagine that the inner circle is the body and the outer circle is the garment. I calculated the radius of each circle in the pair and subtracted the radius of the smaller circle from the larger one. The difference between the outer circle and the inner circle is the ease. It is not relative to the size of the circles and stays exactly the same as long as the difference in the circumferences stays the same. This is why relative ease doesn’t work. You will not achieve the same fit by applying different amounts of ease across the size range. Notice also that even though the outer circle is 4″/10 cm larger than the inner circle, the difference between the radii is only about 1/2″/1.5 cm.

    How much ease do you prefer? Do you usually follow a design’s suggested ease? Tell us about it in the comments!

    Resources

  • Estimating Yardage

    Estimating Yardage

    Have you ever wondered how designers arrive at the recommended yardage listed in a pattern? Are you designing a sweater and wondering how to accurately list the yardage for sizes that haven’t been knit yet? Or maybe you are changing the gauge or length of a sweater you’re knitting and want to make sure you don’t run out of yarn? In all of these situations you can estimate how much yarn you’ll need using a swatch, a kitchen scale, the information from your yarn’s ball band, and a calculator or spreadsheet. This is how I do it.

    First, determine how much yarn it takes to make a square inch or square centimeter of your knitted fabric. You can start with a large rectangular swatch or an entire garment. Weigh your swatch or sample using the kitchen scale. I like to use the weight in grams because it’s a smaller unit of measure than ounces, and ball or skein weights are usually given in grams.

    Next, determine the area of your swatch or sweater. If your swatch is a square or rectangle you can multiply the length by the height to determine the area. For example, if your swatch measures 8 x 8 inches the area is 64 inches. (If you’re more comfortable with metric go ahead and use centimeters for all measurements instead.) Divide the area by the weight. Let’s say your swatch weighs 10 grams. 64/10 = 6.4. It takes 1 gram of that particular yarn to make 6.4 square inches of that particular fabric. If you wanted to add 2 inches in length to a sweater with a circumference of 40 inches that’s 80 square inches. 80/6.4 = 12.5. You would need an additional 12.5 grams of yarn.

    To find the area of an entire sweater I reduce the design into simple shapes like rectangles and parallelograms as shown in the illustrations below, and multiply the length by the height to find the area of each shape.

    Drop Shoulder

    A line drawing of a drop shoulder sweater showing how the sleeves and body can be reduced to parallelograms and rectangles.

    A drop shoulder sweater is the simplest design for finding the area. The front and back are rectangles and there are two trapezoids for the sleeves. Add the length and width of the two sleeves together to make one parallelogram. If there is a collar it is probably a rectangle also, and you can add the length to the height to find its area.

    Raglan Yoke

    A line drawing of a raglan sweater showing how the yoke forms a square.

    If you take a raglan sweater off the needles at the underarm and lay it out flat you’ll see how the yoke can be simplified into a rectangle. Multiply the chest width by the upper sleeve width before the underarm cast on to find the area of the yoke. Unless it’s a deep V or a scoop neck I don’t subtract anything for the neck. This just adds a little buffer to the yardage. The area of the body below the underarm and the sleeves below the shoulder can be calculated in the same way as the drop shoulder sweater.

    Round Yoke

    A line drawing of a round yoke sweater showing how the yoke forms a circle, and how the sleeves, front, and back form rectangles when combined.

    For round yokes, first determine the radius of the yoke by adding half the neck width to the yoke depth, square the radius, then multiply by pi. This will give you the area of the yoke. The area of the sleeves and the body below the underarms will be the same as the raglan sweater.

    Set-In Sleeve

    A line drawing of a set-in sleeve sweater, and illustrations of all the sweater parts.

    A set-in sleeve sweater will have a few more shapes than the others. The sleeve caps can be treated as trapezoids the same way as the sleeves and added together to create one parallelogram. The body of the sweater below the underarms can still be treated as two rectangles, but if there is significant waist shaping you may wish to break the top and bottom into trapezoids and add them together. The yoke can also be treated as a trapezoid, and adding the front and back together will make a parallelogram.

    After you have determined the area of your sample you can find how many grams of your yarn it takes to make 1 square inch of your fabric by dividing the area of the sample by the weight of the sample. You can then multiply the grams per square inch by the total area of every other size in your pattern. This will tell you how much of that particular yarn it takes to make each size by weight, but you should also convert the weight into yards to make the estimate useful to knitters who want to use a different yarn.

    Using the information from the ball band of your sample yarn, divide the weight of one skein by the yards per skein to find the yards per gram, then multiply the yards per gram by the weight of each size. This will give you the yardage needed for each size. You can also estimate the number of skeins needed for each size by dividing the total weight by the weight of one skein and rounding up to the nearest whole number.

    You can see from the illustrations above that the area measurements are not exact, and each knitter’s tension will affect the amount of yarn used also. These are only estimates, but you want to be sure that your knitters will not run out of yarn before completing their projects, so it is a good idea to add a buffer to the recommended yardage, which is usually 10%, but could be more or less depending on the design.

    Estimating yardage is just one of the tech editing services I offer. Yardage estimates are included with every grading job I do, but I can also check your yardage estimates or calculate the yardage for you when I tech edit your pattern. Just let me know that’s a service you’re interested in and tell me the size and weight of your sample. I would love to know what you think of this method of estimating yardage in the comments!

    Thank you for knitting!

  • The Amazing Invisible Provisional Cast On and Its Many Uses

    The Amazing Invisible Provisional Cast On and Its Many Uses

    One of my favorite cast-on methods is one you can’t see. The Invisible Provisional Cast On can be worked with a bit of smooth waste yarn, a spare circular needle or cord, or sometimes just one circular needle. It allows the knitter to cast on stitches and knit in one direction, then come back to the cast-on stitches and knit in the other direction without creating a visible seam or change in the fabric. It is virtually undetectable in most cases and indispensable for seamless knitting. While it’s not an all-purpose cast-on, there are a few special applications that I find this cast-on method absolutely perfect for. I’d love to know if you are familiar with this cast on and what you use it for. Tell me in the comments!

    Top-Down Underarms

    For this method I use the same waste yarn that I use to hold my sleeve stitches to cast on the underarm stitches. When I go back to pick up and finish my sleeves the provisional cast-on stitches can be placed on the needle along with the held stitches. I like to start my sleeves at one side of the underarm cast on, but you can start in the middle if you want to. There will be one stitch more than there was cast on for the body. I like to pick up a second extra stitch on the opposite side from where I started, then I decrease both of these stitches to close the gaps usually found there. Pay attention to the stitch mount because every other stitch will have its leading leg on the back of the needle, and be sure to work these stitches through the back loop so they won’t twist. I have a step-by-step tutorial in this blog post.

    The middle row of purl stitches in this underarm was cast on using the Invisible Cast On

    Toe-Up Socks

    My favorite way to make socks is from the toe up, two-at-a-time, on a circular needle. After trying other methods, I decided the Invisible Provisional Cast On is the perfect method to achieve neat and even stitches at start of the toe. For this method, I fold my circular needle in half and use the cord in place of waste yarn. A slipknot is placed on the cord and then the cast on is worked over the needle and the cord. I like to knit my socks two-at-a-time, so after the first sock is cast on I place a twisted loop on the needle to hold those stitches in place and cast on the second sock. To join in the round I turn and knit across the stitches I just cast onto the needle, turn, and work across on the provisionally cast-on stitches.

    One sock is cast onto the needle with the provisional stitches held by the cord.
    Place a twisted loop on the needle to hold the stitches in place.
    Both socks are cast on and ready to work in rounds.
    The cast on is invisible!

    Garter Tab Cast On

    To start a garter tab with the Invisible Provisional Cast On I fold my circular needle in half and cast on 3 stitches using the cord to hold the provisional stitches. Then I work back and forth in garter stitch until my tab is long enough. The first row after casting on and the last row before picking up stitches should both be right-side rows. After you’ve picked up the correct number of stitches from the side edge of the garter tab you can just slide the provisionally cast-on stitches up to the needle tip, drop the slipknot, and work the stitches paying attention to the stitch mount so they don’t get twisted.

    This shawl starts with a garter tab using the Invisible Cast On
    Provisionally cast on 3 stitches
    Turn and start knitting back and forth
    Keep knitting until the garter tab is the right length
    pick up stitches along the side edge
    drop the slipknot and knit the 3 provisionally cast on stitches

    The Moebius Cast On

    Cat Bordhi uses the Invisible Cast On to work a Moebius from the center out in her book A Treasury Of Magical Knititng and Craftsy class. The same provisonal cast on is used with the cord holding the provisional stitches, but instead of folding the cord in half the needle is looped back over itself to create a Moebius ring.

    Thank you for knitting!

    Resources

    Knit Picks Traditional Provisional Cast On (photo tutorial and video)

    Suzanne Bryan’s video demonstrating the Invisible Cast On over a spare circular needle

    My Instagram story showing how I use the Invisible Cast On for top-down underarms

  • Winter Is For Knitting Mittens

    Winter Is For Knitting Mittens

    Over the years I’ve made dozens of mittens and fingerless mitts and I thought it would be fun to pull out all of my mitts and mittens and talk about the different types of thumbs that can be used. Most of these patterns can be found on Ravelry, but the links below go to other websites.

    Five pairs of hand-knit colorwork mittens

    This is my current mitten collection. The two pairs on the left have already been given as gifts, I’ve been wearing the two pairs on the bottom right for years, and I just finished the pair on the top right last Spring.

    7 pairs of fingerless mittens

    These are all of my fingerless mitts. The two in the upper left are my own design, Traveling Mitts and Downtown Alley. I like to keep a lot of fingerless mitts around because they wear out after a few years.

    Pink mittens with a pattern of white roses

    I made this pair several years ago and they are just starting to wear out. The pattern for these mittens comes from The Mitten Book, a collection of Swedish colorwork mitten designs. They use a simple afterthought thumb with no increases. This is one of the easiest thumbs to make but it’s not the best fitting. At the point where the thumb separates from the hand half the thumb stitches are knitted with waste yarn and then again with the working yarn. After the mitten is finished the waste yarn is removed leaving live stitches on the top and bottom to work the thumb.

    Arm warmers with a simple thumb slit

    These are my Downtown Alley fingerless mitts. They use a vertical opening for the thumb created by working flat for the length of the thumb slit. They opening is reinforced with cabled stitches at the top and bottom.

    Mittens and fingerless mitts with thumb gussets

    All of these mitts and mittens have thumb gussets. The gusset usually begins with 1 stitch and 2 stitches for every 2 or 3 rounds are increased on each side of the center stitch until the gusset is as wide as the circumference of the thumb. Then all of the gusset stitches are held on waste yarn, 1 stitch is cast on to replace the center stitch, and the mitt or mitten is finished. The held stitches are then returned to the needles to finish the thumb. From left to right the patterns are Belle Ruffle Gloves, CanCans, my own unpublished design, and Pattern 1 from Mostly Mittens: Ethnic Knitting Designs From Russia.

    These are all my Norwegian mittens and I think this type of thumb, a combination of the afterthought thumb and the thumb gusset, is my favorite. Stitches are increased on the palm similar to the thumb gusset, but only half of the thumb stitches are increased. When the gusset stitches are set aside on waste yarn an equal number of stitches is cast on. I especially like how the gusset shaping is incorporated into the colorwork on the palm and back of the hand. The patterns on the left and right are from Selbuvotter: Biography of a Knitting Tradition and the pattern in the center is the Broughton Mittens from Ysolda.

    Cabled fingerless mitts

    My Traveling Mitts are shaped with single increases that start below the wrist on the palm of the hand. When the number of stitches equivalent to the width of the thumb is increased the thumb stitches are set aside. This type of thumb fits very well and allows the pattern from the back of the hand to continue uninterrupted onto the thumb.

    Are you knitting mittens this winter? Tell me about it in the comments! Thank you for knitting!

  • So Long 2020, Better Luck Next Year

    So Long 2020, Better Luck Next Year

    Hello Again! It has been a long time since I posted anything on the blog. I have a dozen draft posts that I would like to finish and share with you, but it has been such a difficult year, I feel like I need to acknowledge everything that has happened before I go back to knitting as usual.

    Three hand-knit dolls stand next to a small garden.

    I lost two very important people this year. The first was my Aunt, she died on January 1st 2020 after a long illness. Of course I miss her terribly. She was always the first person I would call with good news, or if I just needed to talk. She collected all of the magazines I had designs published in, even though she didn’t knit, and she always read new posts on the blog. She was the photographer of the picture above and the recipient of many hand-knits. I have been getting used to not having her in my life anymore, but I’m glad she was.

    A close up of a tabby cat looking directly at the camera.

    In November my cat Roy died. He was an old man and had been suffering from the effects of old age most of this year.

    A tabby cat sitting on a wool cowl in shades of brown and white.

    He loved to sit on my lap while I was knitting, and he always inspected my wooly creations while they were blocking.

    A tabby cat with green eyes lying in green grass.

    When I was learning to improve my photography skills he was often a patient and photogenic model.

    A tabby cat wearing a knitted lace shawl lying a tile floor.

    Then, of course, there is the pandemic. In the US the lack of empathy and understanding during a difficult and divisive time has exposed and exasperated a disregard for science, government failure, wealth inequality, systemic racism, and environmental destruction. Under the weight of all these issues, I didn’t really feel like talking about knitting this year. I know that things won’t magically change with the start of a new year, but I am still looking forward to the end of 2020, and the changes I plan to make in 2021. I hope you’ll stick around for more knitting.

    Side view of a tabby cat lying on a bed with a blurred background.
  • How To Streamline Your Pattern Writing Process and Save Money On Tech Editing

    How To Streamline Your Pattern Writing Process and Save Money On Tech Editing

    I’ve recently been asked for advice on how to produce more patterns faster, and how to keep tech editing costs down when a designer is just starting out. Below is a list of the things that have worked for me and other designers. There is also a list of resources at the end of this post. If you have specific questions about a pattern you’re writing or my tech editing services you can always email me using the form on my tech editing page. I am happy to answer questions!

    The Beginner's Guide to Writing Knitting Patterns book cover photo

    First, buy this book. If you already own it, read it! And refer to it whenever you have questions about pattern writing. There’s a handy index in the back, and the book addresses every aspect of pattern writing, with resources listed for topics that aren’t covered in-depth. I use it as a reference for tech editing, and for writing my own patterns. There are dozens of books about knit design, but this is the only book solely about pattern writing.

    Create A Style Sheet

    I talked about how to create your own style sheet in this post. It does take some extra work, but having a guide to follow when you write your patterns, and for your tech editor to refer to when they check your patterns, will improve consistency and save time. Most patterns will contain the same categories of information, so also setting up a pattern template with the headers you use and the basic layout of your pattern will allow you to fill in the blanks when you’re writing and help to ensure that all of the necessary information is included.

    Copy And Paste

    Your style sheet should include a list of abbreviations and commonly used phrases that you can copy and paste into your pattern. This will save you time typing and ensure consistency within your pattern catalog. If the same actions are repeated in the pattern, you can copy and paste the directions into each section where they are used. If something is done the same way it should be written the same way. Different phrasing is a clue to knitters that something is done differently, which can be confusing if it’s not.

    A picture of an excel spreadsheet showing the concatenate function
=CONCATENATE(I8," (",J8,", ,"K8,", ,"L8,", ,"M8,", ,"N8, ")")
    Cell O8 is the result of the CONCATENATE function shown in the formula bar.

    If you write multi-sized patterns you should copy and paste the numbers into your pattern using excel to avoid transcription errors. This can be a little tricky because the numbers won’t automatically be formatted the way you write them in your pattern. I use the CONCATENATE function to format my numbers with commas and parentheses in excel. I then copy and paste using the special-keep text only paste function to insert the formatted numbers into my document.

    Make Sure Your Pattern Is Complete

    The pattern information page is where I see things left out the most. Have you included needle size and length? Stitch and row gauge? Are all of the abbreviations listed and defined? Did you adjust the measurements to reflect the actual stitch counts? Your tech editor can’t check it if it’s not there, so be sure to include everything that will be included in the final pattern in the draft you send them.

    Photos are also important and often left out. Close-ups of stitch patterns and shaping details can be very helpful in illustrating instructions. Even if you haven’t done the final layout and added the best photos to the pattern, include a few photos when you send the pattern to your editor. They don’t need to be perfect, but they should represent what the piece looks like.

    Check Your Work

    Before you send your pattern to a tech editor let it rest for at least a day, maybe more, then check the pattern yourself. Setup a spreadsheet and check all of the numbers in your pattern. We all know that you can’t accurately edit your own work because you will see what’s supposed to be there, not what you actually wrote. That does not mean you shouldn’t edit your own work at all, just that you should not be the only editor. Having someone else look over your pattern with a critical eye, especially a professional tech editor, is a crucial step in ensuring that your pattern is as error-free as possible.

    Just Ask

    If you’re having difficulty writing part of your pattern there are designer forums on Ravelry and Facebook where you can ask questions and get opinions from other designers. Test knitters are invaluable for making sure that a pattern is easily understood. You can also ask your TE to recommend resources for help with specific issues, or to pay special attention to something you had difficulty with while writing.

    Resources

    Marnie Maclean’s pattern writing tutorials

    Budding Designers Ravelry Group

    Designers Ravelry Group

    The Tech Editor Hub Facebook Group

    Knit Designers On FB Facebook Group

    Craft Yarn Council Standards And Guidelines

    Thank you for knitting!