Author: Kephren

  • What’s Your Style?

    What’s Your Style?

    If you write patterns for other people to use, you ought to have a style sheet. Having a style sheet will help to ensure that your patterns are consistent and complete, and save time writing and editing. I wrote this post to answer your questions about what a style sheet is, why you should have one, and how to develop and use your own style sheet. If you are not a knit designer, you may find this post a bit boring, but that’s okay! Come back next time and I’ll have a new pattern to talk about.

    Decisions, Decisions

    Knit design is all about making decisions. If it’s a sweater, is it a cardigan or pullover? bottom-up? Or top-down? Raglan? Drop shoulder? Seamless set-in sleeve? These are all design decisions and will likely be different for every pattern. The way the pattern is written, however, should be consistent for all patterns from a single source. That’s where a style sheet becomes incredibly useful and time-saving. It is a set of decisions that you have already made, that will stay the same for every pattern you write.

    Abbreviations

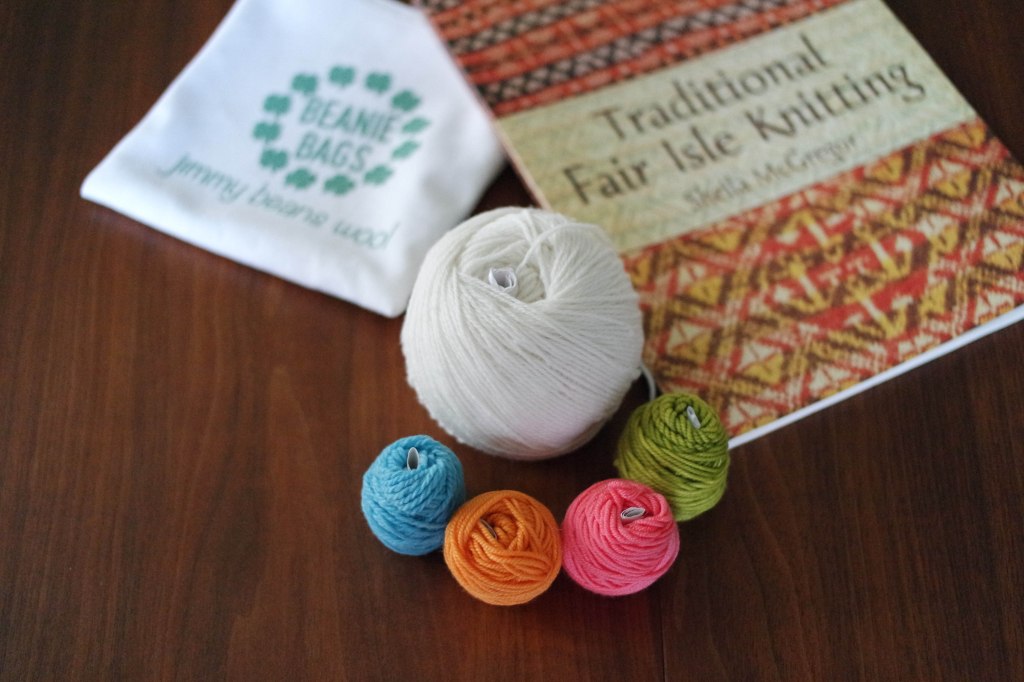
    The easiest place to start is with a list of abbreviations. Your style sheet should include all the possible abbreviations that you could ever use in a knitting pattern. There aren’t any true standards for knitting abbreviations, but every brand has its own list. I’ve listed links to the abbreviations lists used by a few major publishers below, as well as my own.

    Knit Picks Glossary of Terms

    Interweave Knits and Knitscene Abbreviations PDF

    Craft Yarn Council Knitting Abbreviations

    Kephren Knitting Studio Abbreviations

    Phrasing

    The phrasing is not what you say, but how you say it. The five sentences that follow say exactly the same thing, but in different ways. Which one you choose will depend upon several different factors. How much space do you have? If you’re planning to publish in print you may want to save space by choosing option 1. Who is your audience? If you’re writing for beginners options 2 or 5 will probably be your best choice, whereas if your pattern is written to appeal to experienced knitters you might choose option 3. Option 4 is not one that I would recommend, but I included it because I see it used sometimes by independent designers. If I saw this in a pattern I was editing I would suggest replacing it with 1 or 2 because it’s not clear what the third asterisk refers to.

    1. Row 1: [K2, P2] to end.
    2. Row 1: *K2, p2; rep from * to end of row.
    3. R1 – Work in k2, p2 ribbing across.
    4. Row 1: *K2, p2,* rep from * to end.
    5. Row 1 (right side) *Knit two, purl two; repeat from * to end.

    The best way to figure out your phrasing is to write a simple pattern. It doesn’t have to be something you intend to publish, or even to knit, but thinking about phrasing in the context of a pattern will help you to determine what you need to say and how you want to say it. Reading other designers’ and publisher’s patterns will give you an idea of the many phrasing options available, and thinking about your audience will help you to decide which you want to use.

    Fonts and Formatting

    I think the single most important thing when choosing a font for knitting patterns is the difference between the number 1 and the letter l. Of course, you also want a font that is easy to read, and remains readable in both bold and italic. When to use bold and italic is another decision you’ll have to make for your style sheet. You’ll also have to decide how to arrange all the elements of your pattern. Does your abbreviations list appear at the beginning of the pattern? Or the end? Do your directions cover the whole page? Or are your pages divided into two or three columns? Where do Page numbers go? Photos? Charts?

    Using Your Style Sheet

    Now that you’ve made all of these important decisions you can save a lot of time by setting up a pattern template. Include your complete abbreviations list, cast-on, bind-off, and finishing directions, and examples of gauge requirements and materials lists. This way, the next time you write a pattern you only have to fill in the missing information and delete the abbreviations that aren’t used in that particular pattern.

    You’ll also want to send your style sheet to your tech editor along with the pattern you are having edited, but even before you do that, check your pattern against your style sheet yourself. Make sure that it includes all the necessary information and that it adheres to your style sheet. This final check is also a good opportunity to spot mistakes and typos.

    You can see what my style sheet looks like here. I developed my style sheet using the template provided in Edie Eckman’s Craftsy Class; Pattern Writing For Knitters, and Kate Atherley’s book; The Beginner’s Guide To Writing Knitting Patterns. It has changed a bit since I wrote my first pattern, and I continue to update it when I use a new technique or abbreviation. Your own style sheet will evolve as you continue to write patterns too, so don’t worry if you haven’t got it all figured out right away!

    If you want help creating your style sheet you can contact me through my tech editing page.

    Thank you for knitting!

  • The Blowout Cardigan and Weaving In Ends With Bulky Yarn

    The Blowout Cardigan and Weaving In Ends With Bulky Yarn

    I made the Blowout Cardigan for the Winter issue of Knitscene magazine. It’s a fun little cardigan worked in bulky yarn with a lace pattern on the sleeves; the perfect thing for holiday parties and cold weather layering. The bulky wool, Universal Yarns Deluxe Superwash Bulky, is soft and easy to work with, but it did present a challenge. I usually attach new skeins using the wet splice method, but I didn’t think the ends would felt together well enough in superwash wool. Simply weaving in the ends wouldn’t do either, because the yarn is so thick it would leave a noticeable bulge wherever I attached a new skein. Instead I used the method shown below, I don’t use it often, and I thought it would be unusual enough to merit a photo tutorial.


    SAMSUNG CAMERA PICTURES
    When it’s time to attach a new skein drop the old yarn and pick up the new yarn leaving about a six inch tail of each. I like to tie an overhand knot to keep the tension even in this spot, but I take it out before weaving in the ends.


    SAMSUNG CAMERA PICTURES
    Using a tapestry needle weave each end into the stitch next to it to close up the small hole where skeins were changed.


    SAMSUNG CAMERA PICTURES
    Now comes the fun part! Separate the plies of both strands of yarn. The yarn I used was a 4 ply, so there are 8 single plies to weave in.


    SAMSUNG CAMERA PICTURES
    Using a sharp needle weave in each end by skimming the needle diagonally through the backs of the stitches. First in one direction…


    SAMSUNG CAMERA PICTURES
    and then back the opposite way.


    SAMSUNG CAMERA PICTURES
    When all the ends are woven in it will look like this.


    SAMSUNG CAMERA PICTURES
    Clip the excess yarn and you’re done!


    knitscene-winter-2016-0469_medium2
    copyright Knitscene/Harper Point Photography

    It may seem like a little extra work, but weaving in ends this way produces such a neat result that it is totally worth it!

    Thank you for knitting!

  • The Augusta Cardigan – Construction And Fit

    Since the Augusta Cardigan was published I’ve received quite a few questions about how to choose which size of this sweater to make. Although it’s called a cardigan, this piece is really more of an over-sized shrug, or what’s sometimes called a cocoon. While I was working on this pattern I posted this rather cryptic photo on Instagram showing my experiments with the shape and construction.


    The sweater starts as a rectangle, with the sides of the rectangle forming the sleeves and sleeve seams, (you can’t see the sleeve seams on the finished piece because they’re grafted together invisibly) and the top and bottom of the rectangle forming the back neck, the front edges, and the back at the hip. In photo 1 below you can see how the piece looks flat, before joining the sleeve seams. I marked the points that are joined with the letter A on one side, and the letter B on the other. In photo 2 there’s a piece of tape over one of the A’s, and in photo 3 that side is folded and A is joined to A. In photo 4 the other side is joined as well.

    1-kephren-knitting-studio

    After the sleeves are joined and the basic shape of the piece is formed, stitches are picked up along the bottom edge and worked in a rib and cable pattern. You can see this section in the photo below. The number of stitches picked up is different for each size, and the width of this panel is what determines the hip width, which should be close to, or the same as half of your hip circumference. The other point on the sweater that needs to come close to your actual measurement is the sleeve circumference at the elbow, which is determined by how many stitches are left at the opening after joining the sleeve seams.

    Copyright Harper Point Photography
    Copyright Harper Point Photography


    These two points should help you to choose a size, but if you are still unsure, have a look at the back length. Because of the way it’s constructed, the width and the length have to increase proportionately, so the larger sizes are also longer at the back. Because of the way the cable panel is worked, there are only a few rows that are good stopping places in the pattern, so there are three different back lengths for the six sizes.

    Remember that this is an open and loose style and the fit doesn’t need to be exact! If you’re still having trouble deciding on a size, you can ask your questions in the Kephren Knitting Studio Ravelry group, or in the comments at the end of this post. I’m excited to see finished and in-progress Augusta Cardigans popping up, so be sure to tag me on Instagram or Facebook (@kephrenknitting) if you share your pictures there.

    Thank you for knitting!

  • A Thousand Words

    One of my goals this year was to improve my photography, and since the year is half over, now seems like a good time for an update.image

    I’ve been taking Emma Davies A Year With My Camera course, and I have been having lots of fun practicing!

    image

    Apart from the technical details, like how to use aperture, shutter speed, and ISO to get the pictures I want, I’ve learned a bit about composition and creativity.

    image

    It took me a while to realize that a photo does not have to be an exact replica of what I see, it’s my interpretation of what I see, and just as there are no knitting police, there are no photo police either.

    image

    Another thing I discovered is that all photos need to be edited. It may seem obvious, but it wasn’t to me.Pelican in Lake Michigan


    I’ve tried a few different photo editing programs on my computer; Picasa, Adobe Lightroom, Gimp. I struggled with all of them.

    image

    More and more I’ve been transferring my best photos to my phone and editing them with snapseed. It is so much easier to use, and I think the results are just as good.

    image

    I hope you enjoyed this random assortment of my favorite photos, and I’ve saved the best for last; yarn!

    image

    Thank you for knitting!

  • Off The Chart

    Off The Chart

    Most knitters have strong opinions about charts; they either love them or hate them. Personally, I prefer charts over written directions because they help me to visualize what my knitting will look like. It is also a lot easier for me to write a pattern by placing symbols on a chart than writing it out row by row. If you have never tried knitting from a chart, or found it too difficult when you did, I hope the following tips will help you to make better use of charts in your knitting. Charts are just another tool, and learning how to use them can make following a pattern easier, and more fun!

    Even if you prefer to follow written directions, understanding how to read knitting charts can help you to find and fix your mistakes, to determine which row you are on in the pattern, and to give you an idea of what the pattern should look like. You can think of a knitting chart like a map. It shows all of the stitches in the pattern as viewed from the right side. A written pattern is more like turn-by-turn directions; it will tell you where to go next, but if you get lost, or make a wrong turn, it can be difficult to figure out where you are. Both the chart and the written directions below will create the knitting in the picture, but the chart shows both how to produce the knitting pattern, and what it will look like when it’s done

    A knitting chart is a visual representation of a knitting pattern.

    Chevron Pattern


    Chevron Lace

    Row 1: K5, k2tog, yo, k3, *yo, ssk, k2, yo, ssk, k3, k2tog, yo, k3; rep from * to last 11 sts, yo, ssk, k2, yo, ssk, k5.

    Row 2 and all WS rows: Purl.

    Row 3: K4, k2tog, yo, k2, k2tog, yo, *k1, yo, ssk, k2, yo, ssk, k1, k2tog, yo, k2, k2tog, yo; rep from * to last 11 sts, k1, yo, ssk, k2, yo, ssk, k4.

    Row 5: K3, k2tog, yo, k2, k2tog, yo, k1, *k2, yo, ssk, k2, yo, sl1-k2tog-psso, yo, k2, k2tog, yo, k1; rep from * to last 11 sts, [k2, yo, ssk] twice, k3.

    Row 7: K6, k2tog, yo, k2, *k3, yo, ssk, k5, k2tog, yo, k2; rep from * to last 11 sts, k3, yo, ssk, k6.

    One of the advantages to working from a chart is being able to see how the stitches on the needle relate to the stitches below it. Don’t cover up the rows that have already been worked! if you need to keep your place in the chart using washi tape, highlighter tape, a ruler, or a magnet, place it above the row you are working on. You can see in the photo below how the decreases line up to create diagonal lines in this pattern. The decreases in your knitting should also line up to create diagonal lines, and you’ll be able to tell that you’ve made a mistake if they don’t.

    How to read a knitting chart-04201695

    Markers can also help you to keep track of where you are in a pattern. Place markers to correspond with the repeat section on the chart, then when you reach the marker you know that you’ve reached the end of the repeat. Isolating each repeat section can also help you to find mistakes, just check each repeat section against the chart.

    Fixing yo mistakes-04201694

    Some things to be aware of when using a knitting chart

    • Charts show the knitting as seen from the right side, if they show the wrong side at all, the symbols will mean the opposite of the right side directions. Knit and purl are two sides of the same stitch, so the same symbol is used for knit on the RS, and purl on the WS. You will have to do a little mental conversion when working the WS rows of a chart, but the chart key will tell you what to do if you’re not sure.
    • Charts are read from bottom to top, RS Rows are read from right to left, and WS rows are read from left to right. Every row starts with the row number, so RS rows are numbered on the right side, and WS rows are numbered on the left side.
    • Chart symbols aren’t standardized. Although most chart symbols are designed to look like the stitches they represent, chart symbols may be different from one pattern to the next. Be sure to check the chart key for the pattern you are using, and read the directions on how to follow the chart.

    Further reading and resources

    Ravelry Groups Chart Haters Anonymous and SymbolCraft – For folks who love charts

    Blogs

    Tin Can Knits – How to read a chart

    Knitty – Charts are your friends

    Ysolda – Using charts, even if you hate them

    YouTube Knit Purl Hunter – How to read a knitting chart

    Thank you for knitting!

  • Fixing yo Mistakes

    Fixing yo Mistakes

    I use a lot of lace patterns in my designs because they look beautiful, and they’re fun and interesting to work. Unlike plain stockinette or garter stitch, there is always something happening! A yo here, a k2tog there, a k3tog followed by a yo2, etc. Lace patterns have a lot going on, which means there are a lot of opportunities for making mistakes. Fortunately, yarn over (yo) mistakes are pretty easy to fix, if you catch them within a row or two of making them. The photos below show how to fix a yo in the wrong place, and how to add a yo where one is missing.

    Fixing yo mistakes-04201683First, compare your knitting to the pattern. In this photo there is one extra yo and one missing yo on Row 7, the last RS row. One WS row has been worked since the mistakes were made, so the mistakes are 2 rows below the stitches on the needle.Fixing yo mistakes-04201684Work in pattern until you reach the extra yo. There’s no need to rip out whole rows for a tiny mistake like this!

    Fixing yo mistakes-04201685Drop the extra yo off the needle. That’s it! The yarn over isn’t connected to the stitches below it, so it will only unravel to the row where it was made. There will be a little extra yarn where the yo used to be, but you can usually wiggle the slack along the row until it disappears. In this case we’ll need that extra yarn to create the missing yo.

    Fixing yo mistakes-04201687This is where the yo should be. If you pull the needles apart a little you can see the 2 strands that are going to form our yo. It looks a lot like the one we just took apart.

    Fixing yo mistakes-04201688First, pick up the lower strand

    Fixing yo mistakes-04201689

    and place it on the left needle.

    Fixing yo mistakes-04201691Then pick up the strand that was above it and place it on the left needle. The strand from 2 rows below is on the left and the strand from 1 row below is to the right of it.Fixing yo mistakes-04201692

    Lift the first strand over the second

    Fixing yo mistakes-04201693

    and off the needle. Now the yo is right where it’s supposed to be!

    Fixing yo mistakes-04201694The mistakes are fixed and the knitting matches the chart again!

    Further reading and resources

    Twist Collective – The Error Of Our Ways: A Knitter’s Guide To Fixing Mistakes

    Very Pink – Correcting Mistakes

    Thank you for knitting!

  • The Knitting is Done

    The Knitting is Done

    I finished knitting the Red River Wrap about a week ago, washed it, blocked it, and photographed it. I spent a few hours yesterday working on the pattern layout and then sent it to my tech editor. She’ll find all my mistakes and send it back to me for another revision. I’ve revised the pattern five or six times already, so it’s nearly there. My test knitters have given me loads of helpful feedback and found a lot of my mistakes.

    Red River Wrap -04101528

    I took pictures next to the Red River over the weekend using my usual setup; tripod, remote viewfinder, and yours truly modeling. It was windy and bright that day, but I managed to get a few good shots when the clouds passed over the sun. I spent a few hours yesterday editing them, and I still need a few more detail shots for the pattern.

    Red River Wrap -04101502

    So, the knitting is done, but there is still a bit more work to do before the pattern is ready. The next meeting of the Tribe of Maker Mornings is April 26th, and it looks like the pattern will be ready to publish by then! Did I mention that I am really happy with the way it turned out? The yarn from Manos Del Uruguay is gorgeous, and was delightful to work with which is a good thing, because I used a lot of it! almost 2 full skeins, or about 900 yards. The shawl looks just the way I wanted it to. You can clearly see the rows of pine trees, the chevrons of the water, and the Herringbone pattern of the bricks.

    1-The Knitting is Done

    Be sure to sign up to my mailing list to be notified when the pattern is released, and to receive a discount coupon!

    Thank you for knitting!

  • Getting To Know Ewe

    Getting To Know Ewe

    I may have mentioned before that I live in a yarn desert, so last month I signed up for a Jimmy Beans Beanie Bag subscription. Receiving 4 or 5 small yarn samples in the mail, along with a cute little bag, a packet of soak, and a fun extra like stitch markers, sounded like the perfect thing. March’s Beanie Bag was printed with Shamrocks and included four yarns in happy spring colors that all followed the theme “Merino and Friends”.

    The only way to truly get to know a new yarn is to knit with it, so on Saturday night I gathered up my precious little balls of yarn, a ball of sport weight Cormo wool from my stash, (Cormo is another friend of Merino) and the book Traditional Fair Isle Knitting.

    20160327-03271316

    Fair Isle knitting is easiest when worked in the round, and I didn’t want the cast-on edge curling up on itself, so I cast on 48 stitches with the Turkish Cast-On to create a flat tube that’s closed at the bottom, and I practiced my two-handed Fair Isle technique. It still feels awkward most of the time, but I’m getting better at it! After a few hours I had most of this done.

    20160329-03291337

    I just finished it up this morning by adding the opening at the top and the i-cord edging. A little light blocking helped to even out the stitches. To my surprise what I ended up with was a cell phone cozy, exactly the size of my phone. I really hadn’t planned on that, but the pattern that came with the Beanie Bag was for a cell phone cozy, so maybe it lodged somewhere in my subconscious that that was what I was making.

    20160329-03291341

    It was a fun little project and I got to try out yarns that I’ve never used before. I’m excited to see what’s in next month’s Beanie Bag! Is it April yet?

  • The Red River Wrap

    The Red River Wrap

    When I moved to central Louisiana almost three years ago I didn’t know anyone except my partner and his friends, and although they were all very nice, none of them were knitters. He knew I would be happier if I had some friends of my own, so he asked around and found The Red River Stitchers, a group of knitters and crocheters who meet at the local college every week. He sent me off to my first knit night with them like a kid going to a new school, he even made sure I had a bag of chocolates to share “so they will know you’re a real knitter.”

    Those ladies have since become my dearest friends. They encouraged me to publish my first pattern, the Madeline Shawl, and whenever I’m having trouble with a project they lend me the confidence I need to go on. I call them my PR team and they refer to me as their designer! To show my appreciation for this wonderful group of ladies I wanted to design a simple rectangular shawl pattern and call it the Red River Wrap. The name was the easy part, but coming up with a pattern took a bit longer. It wasn’t until recently that I knew what the Red River Wrap would look like.

    One of my knitting friends is a member of The Tribe of Maker Mornings, a group of artists and manufacturers here in Cenla who meet four times a year to share their enthusiasm for making good stuff. I went to my first meeting last week, which happened to be the sign-up meeting for 100 Days of Making, a challenge to all makers to spend 100 days making something and sharing the process with the group. I signed up to design, knit, and publish a pattern for the challenge, without having any idea what the pattern would be. I would think of something.

    Herringbone brickwork in Alexandria

    When I left the meeting, I crossed the brick streets in downtown Alexandria to the Red River, and looked across at the city of Pineville. I drove home thinking about the project, and spent a few days charting, sketching, and swatching. I chose stitch patterns that reminded me of the trees of Pineville, the brick work of Alexandria, and the churning waters of the Red River. Finally, I wrote this this proposal and sent it to a yarn company to ask if they would supply the yarn for the project. They generously agreed, and I received two lovely skeins of Manos del Uruguay Fino in my mailbox. The colors reminded me of Mardi Gras, and I knew what the Red River Wrap would look like.

    Manos del Uruguay Fino

    Aside from Boring Gray Socks, everything I’m knitting right now is secret, so I’m excited to have a project I can actually share! First I’ll write the pattern, layout the charts, and swatch until I’m happy with my fabric, then I’ll knit the sample. After I have knitted and photographed the sample, I’ll send the pattern with pictures to a tech editor and I’ll find 5 to 10 test knitters. The tech editor checks to make sure that my math is correct and the charts agree with the written directions. Test knitters might find those types of errors too, but I rely on them to make sure I have a pattern that other people can follow easily. Once they have spotted all my mistakes and I’ve revised the pattern, it’s ready to publish and it will be for sale in my Ravelry Pattern Store.

    You can follow the progress of all the makers on Instagram with the #100dayscenla hashtag. Thank you for knitting!


  • How To Wear A Shawl

    How To Wear A Shawl

    Most of the knitters I know love to knit shawls. Shawls are fast, and fun to knit, they are an excellent way to show off beautiful hand-dyed yarns, and a stylish and versatile accessory. So, how do you wear a shawl? I’ve put together some pictures of me modeling each of the shawl shapes from the beach collection (crescent, side-to-side triangle, and asymmetrical triangle.) There are also links to Youtube videos at the bottom of this post by two expert shawl wearers. I hope this will give you some ideas! If you have a picture to share you can tag me on instagram @kephrenknitting, or post on my Facebook page. Thank you for knitting!

    The Wake shawl


    The Tide shawl


    1-Collages


    This is Stephen East (twin brother to Stephen West?) demonstrating how to wear a shawl.

    Here is a ridiculously entertaining video from Wendy’s Lookbook demonstrating 25 ways to wear a scarf.