Category: Technical Editing

  • Ease

    Ease

    What Is Ease?

    Ease is the term used to describe the difference between the size of a garment and the size of the body the garment is intended to fit. There are two types of ease used in garment design–wearing ease and design ease. Wearing ease is necessary for movement in places like the underarm and elbow. Whether the garment is designed to wear over other clothing or just undergarments will also help to determine how much wearing ease is needed. Design ease determines the shape and fit of a garment. A batwing sweater will have a lot of ease at the underarm and chest while a set-in sleeve sweater will usually have only a small amount of ease. In a bulky sweater the thickness of the fabric will take up some of the ease between the outer circumference of the sweater and the circumference of the body. Some garments can be worn with negative ease for a form-following fit because of the inherent stretch of knit fabric.

    Some general guidelines regarding ease and fit:

    • Very close fit – 0 to 2″/5 cm negative ease
    • Close fit – 0 to 2″/5 cm positive ease
    • Standard fit – 2 to 4″/5 to 10 cm positive ease
    • Loose fit – 4 to 6″/10 to 15 cm positive ease
    • Oversized fit- 6″/15 cm or more positive ease
    Augusta is a cocoon-style cardigan with a lot of design ease at the underarm.
    Kephren wearing the Spring Thaw Cardigan with zero ease
    The Spring Thaw Cardigan is a set-in sleeve sweater worn with zero ease at the bust.

    How To Determine Your Preferred Ease

    Ease is ultimately a matter of personal preference. Some people like to wear their sweaters with a lot of ease and others prefer no ease at all. The amount of ease suggested in a pattern is just a suggestion, based on a theoretical range of body sizes. Every knitter will not fit neatly into one of these sizes. When I am grading a knitting pattern I apply the same amount of intended ease to each size to maintain a consistent fit across the size range, but the amount of ease the garment is worn with is ultimately up to the knitter. Hand knitting is wonderfully customizable, and knitters can choose the amount of ease they prefer. An evenly graded size range, a schematic, and finished measurements will make it easier for knitters to achieve the fit they want.

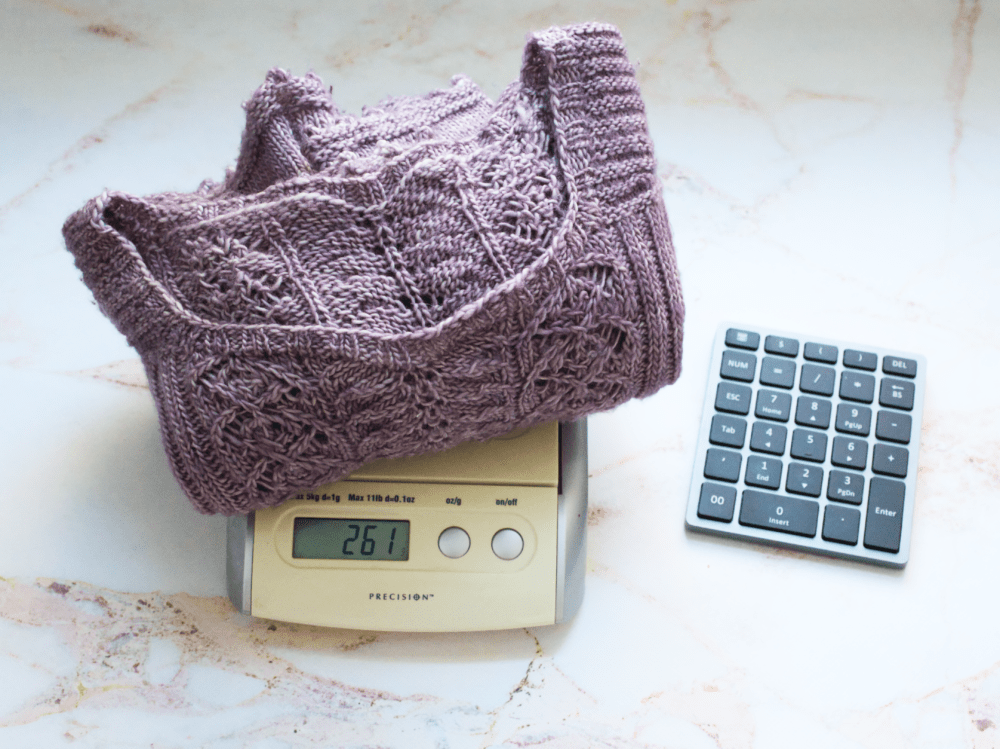
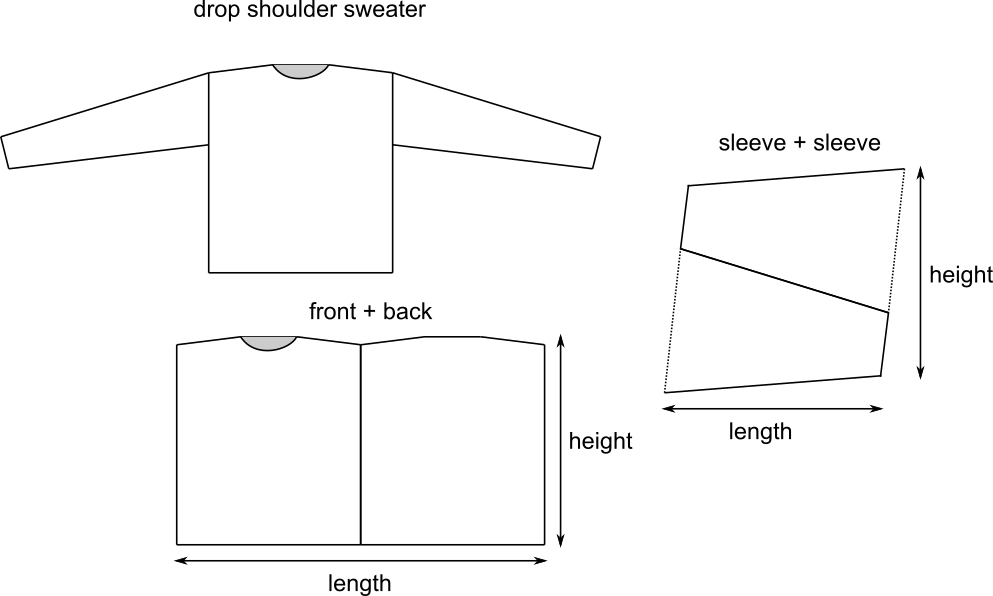
    To determine how much ease you prefer, measure the width of a sweater that you like the fit of at the bust/chest and multiply the width by 2 to get the circumference. Then measure your body around the fullest part of your bust/chest. Subtract your body measurement from the sweater measurement. This is your preferred ease and corresponds to the suggested ease given in a pattern. If a pattern suggests 6″ to 8″/15 to 20 cm of ease but you know from your measurements that you prefer 2″/5 cm of ease, you may want to knit one size smaller than suggested for your chest measurement.

    It’s also important to get the right amount of ease at the upper arm. Measure the width of your sweater’s sleeve just below the underarm and multiply by 2 to get the circumference, then measure around your arm just below the underarm. Subtract your arm measurement from the sweater measurement to determine how much ease you like in your sleeves. Now look at the upper arm circumference of the pattern size you chose. If the pattern’s sleeve circumference is the same as your well-fitting sweater, that’s perfect! If the upper sleeve circumference is different from your preferred sleeve circumference you may want to choose a different size or adjust the circumference of the sleeve. Negative ease in the sleeves will make them ill-fitting and uncomfortable.

    The Lake Geneva Sweater shown in size 35 1/4″/89.5 cm and worn with 2″/5 cm negative ease.
    The Lake Geneva Sweater shown in size 43 3/4″/111 cm and worn with 6″/15 cm positive ease.

    Ease and Bust Size

    You can see from my two versions of the Lake Geneva Sweater above that the same garment can look very different depending on the amount of ease it’s worn with. Ease is calculated at the full bust, so the size of your bust relative to the rest of your torso will also affect the amount of ease in your garment. My high bust measurement (measured around my chest just below the underarms) is 34 1/2″/87.5 cm and my full bust is 38″/96.5 cm. The smaller version, worn with negative ease at the bust, still has some positive ease in the sleeves and body because my full bust is 3 1/2″/9 cm larger than my high bust, and most standard women’s size charts assume a B cup, or a full bust 2″/5 cm larger than your high bust. If you wear a C or D cup, or your full bust is 3″ to 4″/7.5 to 10 cm larger than your high bust, you may need less ease at the full bust to achieve your preferred fit everywhere else. If your cup size is larger than DD or 5″/12.5 cm larger than your high bust, you may wish to make a smaller size than recommended to fit the rest of your body and add extra fabric at the bust only with additional rows or stitches in the front of the garment.

    The Relative Ease Fallacy

    There have been some discussions recently about whether larger people need to have more ease in their garments to achieve the same look and fit as smaller people wearing the same type of garment. I think this idea is based on false assumptions and a misunderstanding of geometry. Remember, ease is the difference between the body measurement and the garment measurement. If the same amount of ease is applied to each size in the range, the difference between the body and garment measurements will remain the same.

    Two pairs of circles demonstrating how ease remains the same when applied consistently. A 34"/86.5 cm circle within a 38"/96.5 cm circle has a 0.6"/1.6 cm radius difference, and a 54"/137 cm circle within a 58"/147 cm circle also has a 0.6"/1.6 cm radius difference.

    The two pairs of circles above illustrate what happens when the same amount of ease is applied to two different size garments. Imagine that the inner circle is the body and the outer circle is the garment. I calculated the radius of each circle in the pair and subtracted the radius of the smaller circle from the larger one. The difference between the outer circle and the inner circle is the ease. It is not relative to the size of the circles and stays exactly the same as long as the difference in the circumferences stays the same. This is why relative ease doesn’t work. You will not achieve the same fit by applying different amounts of ease across the size range. Notice also that even though the outer circle is 4″/10 cm larger than the inner circle, the difference between the radii is only about 1/2″/1.5 cm.

    How much ease do you prefer? Do you usually follow a design’s suggested ease? Tell us about it in the comments!

    Resources

  • Estimating Yardage

    Estimating Yardage

    Have you ever wondered how designers arrive at the recommended yardage listed in a pattern? Are you designing a sweater and wondering how to accurately list the yardage for sizes that haven’t been knit yet? Or maybe you are changing the gauge or length of a sweater you’re knitting and want to make sure you don’t run out of yarn? In all of these situations you can estimate how much yarn you’ll need using a swatch, a kitchen scale, the information from your yarn’s ball band, and a calculator or spreadsheet. This is how I do it.

    First, determine how much yarn it takes to make a square inch or square centimeter of your knitted fabric. You can start with a large rectangular swatch or an entire garment. Weigh your swatch or sample using the kitchen scale. I like to use the weight in grams because it’s a smaller unit of measure than ounces, and ball or skein weights are usually given in grams.

    Next, determine the area of your swatch or sweater. If your swatch is a square or rectangle you can multiply the length by the height to determine the area. For example, if your swatch measures 8 x 8 inches the area is 64 inches. (If you’re more comfortable with metric go ahead and use centimeters for all measurements instead.) Divide the area by the weight. Let’s say your swatch weighs 10 grams. 64/10 = 6.4. It takes 1 gram of that particular yarn to make 6.4 square inches of that particular fabric. If you wanted to add 2 inches in length to a sweater with a circumference of 40 inches that’s 80 square inches. 80/6.4 = 12.5. You would need an additional 12.5 grams of yarn.

    To find the area of an entire sweater I reduce the design into simple shapes like rectangles and parallelograms as shown in the illustrations below, and multiply the length by the height to find the area of each shape.

    Drop Shoulder

    A line drawing of a drop shoulder sweater showing how the sleeves and body can be reduced to parallelograms and rectangles.

    A drop shoulder sweater is the simplest design for finding the area. The front and back are rectangles and there are two trapezoids for the sleeves. Add the length and width of the two sleeves together to make one parallelogram. If there is a collar it is probably a rectangle also, and you can add the length to the height to find its area.

    Raglan Yoke

    A line drawing of a raglan sweater showing how the yoke forms a square.

    If you take a raglan sweater off the needles at the underarm and lay it out flat you’ll see how the yoke can be simplified into a rectangle. Multiply the chest width by the upper sleeve width before the underarm cast on to find the area of the yoke. Unless it’s a deep V or a scoop neck I don’t subtract anything for the neck. This just adds a little buffer to the yardage. The area of the body below the underarm and the sleeves below the shoulder can be calculated in the same way as the drop shoulder sweater.

    Round Yoke

    A line drawing of a round yoke sweater showing how the yoke forms a circle, and how the sleeves, front, and back form rectangles when combined.

    For round yokes, first determine the radius of the yoke by adding half the neck width to the yoke depth, square the radius, then multiply by pi. This will give you the area of the yoke. The area of the sleeves and the body below the underarms will be the same as the raglan sweater.

    Set-In Sleeve

    A line drawing of a set-in sleeve sweater, and illustrations of all the sweater parts.

    A set-in sleeve sweater will have a few more shapes than the others. The sleeve caps can be treated as trapezoids the same way as the sleeves and added together to create one parallelogram. The body of the sweater below the underarms can still be treated as two rectangles, but if there is significant waist shaping you may wish to break the top and bottom into trapezoids and add them together. The yoke can also be treated as a trapezoid, and adding the front and back together will make a parallelogram.

    After you have determined the area of your sample you can find how many grams of your yarn it takes to make 1 square inch of your fabric by dividing the area of the sample by the weight of the sample. You can then multiply the grams per square inch by the total area of every other size in your pattern. This will tell you how much of that particular yarn it takes to make each size by weight, but you should also convert the weight into yards to make the estimate useful to knitters who want to use a different yarn.

    Using the information from the ball band of your sample yarn, divide the weight of one skein by the yards per skein to find the yards per gram, then multiply the yards per gram by the weight of each size. This will give you the yardage needed for each size. You can also estimate the number of skeins needed for each size by dividing the total weight by the weight of one skein and rounding up to the nearest whole number.

    You can see from the illustrations above that the area measurements are not exact, and each knitter’s tension will affect the amount of yarn used also. These are only estimates, but you want to be sure that your knitters will not run out of yarn before completing their projects, so it is a good idea to add a buffer to the recommended yardage, which is usually 10%, but could be more or less depending on the design.

    Estimating yardage is just one of the tech editing services I offer. Yardage estimates are included with every grading job I do, but I can also check your yardage estimates or calculate the yardage for you when I tech edit your pattern. Just let me know that’s a service you’re interested in and tell me the size and weight of your sample. I would love to know what you think of this method of estimating yardage in the comments!

    Thank you for knitting!

  • What’s Your Style?

    What’s Your Style?

    If you write patterns for other people to use, you ought to have a style sheet. Having a style sheet will help to ensure that your patterns are consistent and complete, and save time writing and editing. I wrote this post to answer your questions about what a style sheet is, why you should have one, and how to develop and use your own style sheet. If you are not a knit designer, you may find this post a bit boring, but that’s okay! Come back next time and I’ll have a new pattern to talk about.

    Decisions, Decisions

    Knit design is all about making decisions. If it’s a sweater, is it a cardigan or pullover? bottom-up? Or top-down? Raglan? Drop shoulder? Seamless set-in sleeve? These are all design decisions and will likely be different for every pattern. The way the pattern is written, however, should be consistent for all patterns from a single source. That’s where a style sheet becomes incredibly useful and time-saving. It is a set of decisions that you have already made, that will stay the same for every pattern you write.

    Abbreviations

    The easiest place to start is with a list of abbreviations. Your style sheet should include all the possible abbreviations that you could ever use in a knitting pattern. There aren’t any true standards for knitting abbreviations, but every brand has its own list. I’ve listed links to the abbreviations lists used by a few major publishers below, as well as my own.

    Knit Picks Glossary of Terms

    Interweave Knits and Knitscene Abbreviations PDF

    Craft Yarn Council Knitting Abbreviations

    Kephren Knitting Studio Abbreviations

    Phrasing

    The phrasing is not what you say, but how you say it. The five sentences that follow say exactly the same thing, but in different ways. Which one you choose will depend upon several different factors. How much space do you have? If you’re planning to publish in print you may want to save space by choosing option 1. Who is your audience? If you’re writing for beginners options 2 or 5 will probably be your best choice, whereas if your pattern is written to appeal to experienced knitters you might choose option 3. Option 4 is not one that I would recommend, but I included it because I see it used sometimes by independent designers. If I saw this in a pattern I was editing I would suggest replacing it with 1 or 2 because it’s not clear what the third asterisk refers to.

    1. Row 1: [K2, P2] to end.
    2. Row 1: *K2, p2; rep from * to end of row.
    3. R1 – Work in k2, p2 ribbing across.
    4. Row 1: *K2, p2,* rep from * to end.
    5. Row 1 (right side) *Knit two, purl two; repeat from * to end.

    The best way to figure out your phrasing is to write a simple pattern. It doesn’t have to be something you intend to publish, or even to knit, but thinking about phrasing in the context of a pattern will help you to determine what you need to say and how you want to say it. Reading other designers’ and publisher’s patterns will give you an idea of the many phrasing options available, and thinking about your audience will help you to decide which you want to use.

    Fonts and Formatting

    I think the single most important thing when choosing a font for knitting patterns is the difference between the number 1 and the letter l. Of course, you also want a font that is easy to read, and remains readable in both bold and italic. When to use bold and italic is another decision you’ll have to make for your style sheet. You’ll also have to decide how to arrange all the elements of your pattern. Does your abbreviations list appear at the beginning of the pattern? Or the end? Do your directions cover the whole page? Or are your pages divided into two or three columns? Where do Page numbers go? Photos? Charts?

    Using Your Style Sheet

    Now that you’ve made all of these important decisions you can save a lot of time by setting up a pattern template. Include your complete abbreviations list, cast-on, bind-off, and finishing directions, and examples of gauge requirements and materials lists. This way, the next time you write a pattern you only have to fill in the missing information and delete the abbreviations that aren’t used in that particular pattern.

    You’ll also want to send your style sheet to your tech editor along with the pattern you are having edited, but even before you do that, check your pattern against your style sheet yourself. Make sure that it includes all the necessary information and that it adheres to your style sheet. This final check is also a good opportunity to spot mistakes and typos.

    You can see what my style sheet looks like here. I developed my style sheet using the template provided in Edie Eckman’s Craftsy Class; Pattern Writing For Knitters, and Kate Atherley’s book; The Beginner’s Guide To Writing Knitting Patterns. It has changed a bit since I wrote my first pattern, and I continue to update it when I use a new technique or abbreviation. Your own style sheet will evolve as you continue to write patterns too, so don’t worry if you haven’t got it all figured out right away!

    If you want help creating your style sheet you can contact me through my tech editing page.

    Thank you for knitting!