Tag: seamless

  • The Side-to-Side Join

    The Side-to-Side Join

    When knitting cardigans, stitches are often picked up and worked onto the front edges of the sweater for the button bands and button hole bands. Perfectly serviceable bands are created this way, and if care is taken to pick up the correct amount of stitches and work at the right gauge, the bands will work, but there are a few things that can go wrong. The bands may pucker (too few stitches picked up) or flare (too many stitches picked up). Ribbing, seed stitch, and garter stitch, all excellent band choices for their non-curling properties, have a tendency to spread width wise, which can cause perpendicular bands to droop.

    One way to avoid all of these problems is by working the bands in the same direction as the body of the sweater, parallel to the fronts. The same number of rows can be worked on the band as there are on the front of the cardigan, but at a tighter gauge, giving the bands just the right amount of stretch. Seed stitch, ribbing, and garter stitch are given a firm vertical tug, keeping their width-wise spread in check. A different color can be used, or even a different yarn. Bands like this are often sewn on, or sometimes stitches are picked up along the sweater fronts and bound off as the band is attached.  I think the side-to-side join is the neatest and easiest way to attach parallel front bands, but I rarely see it used, so I’ve illustrated the technique in steps below.

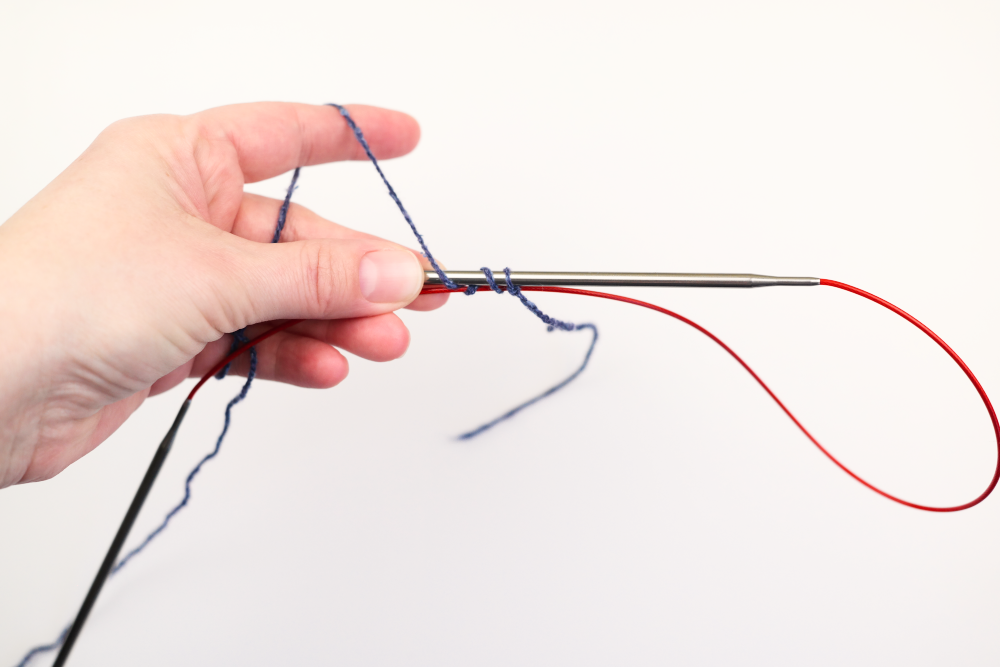
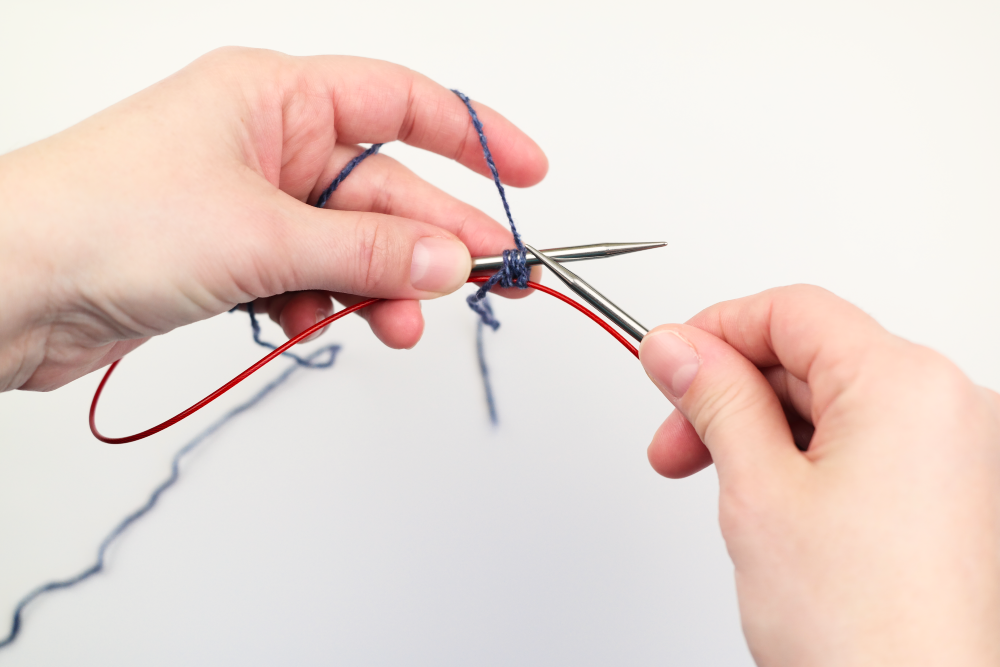
    Setup: Start by casting on the number of stitches needed for your band. Double pointed needles or short straight needles 1 or 2 sizes smaller than the needles used for the body of the sweater will work best.

    SAMSUNG CAMERA PICTURES

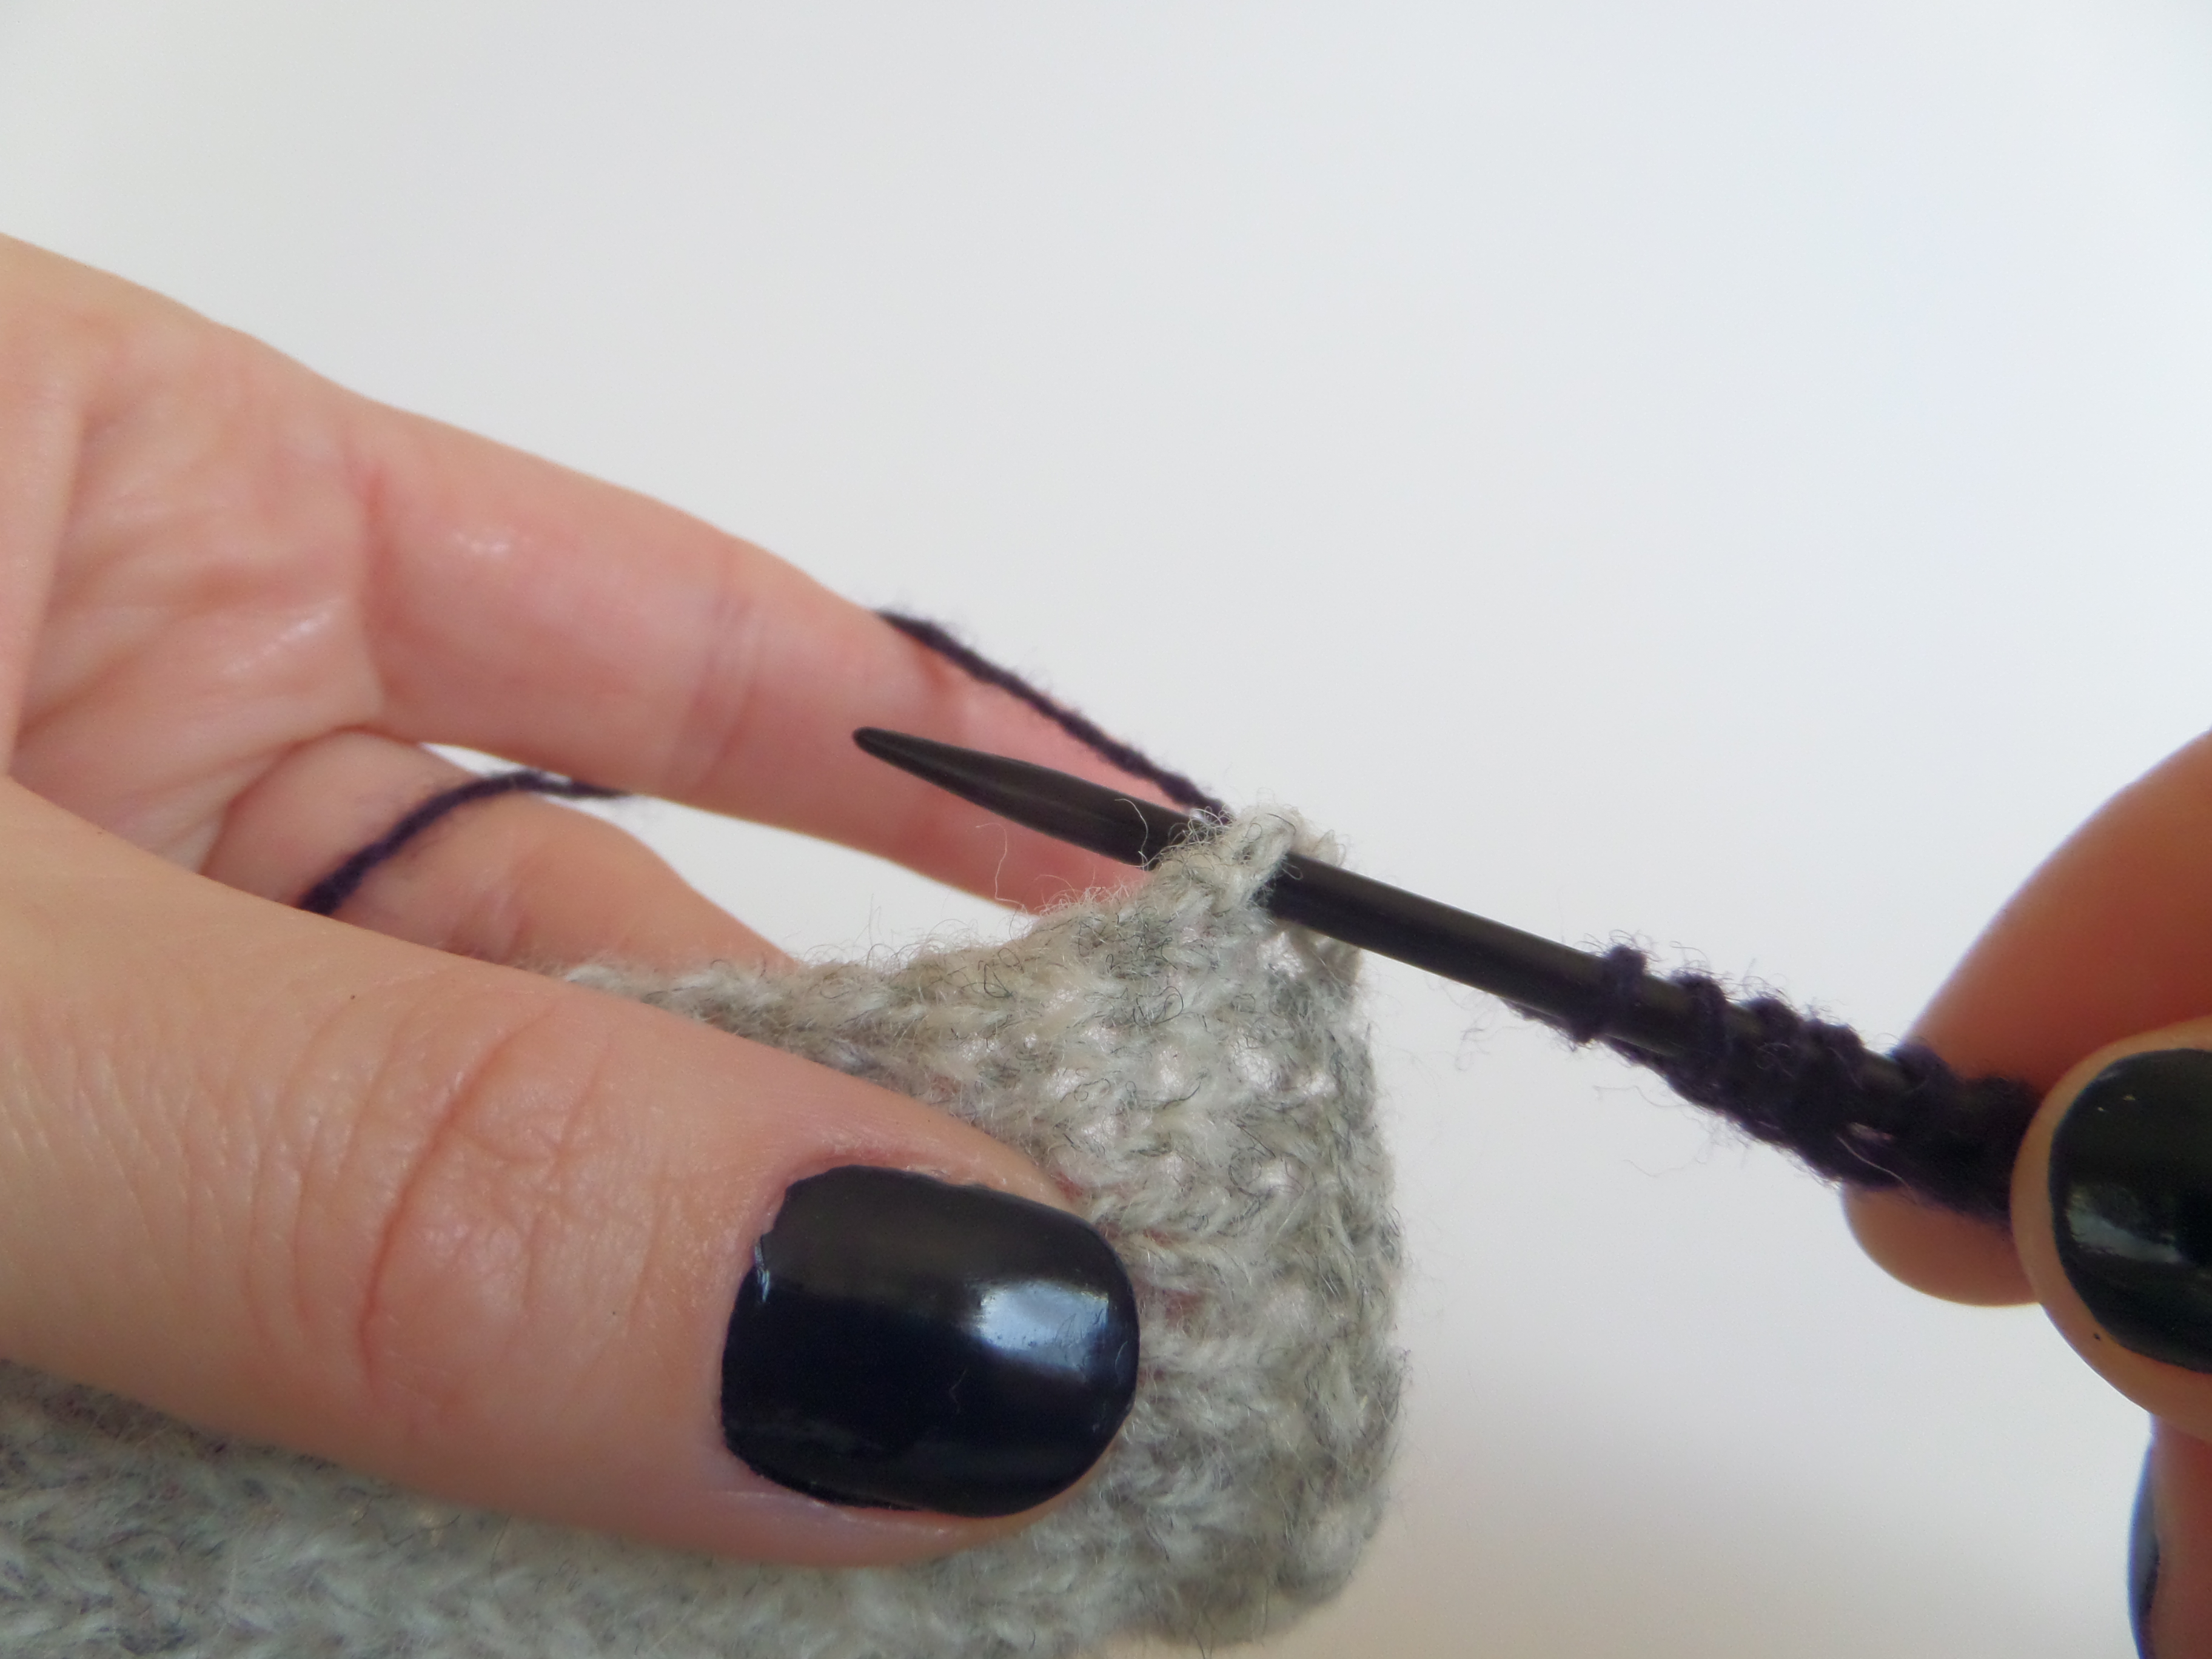
    Step 1: Insert the needle into the edge of your cardigan from front to back.

    SAMSUNG CAMERA PICTURES

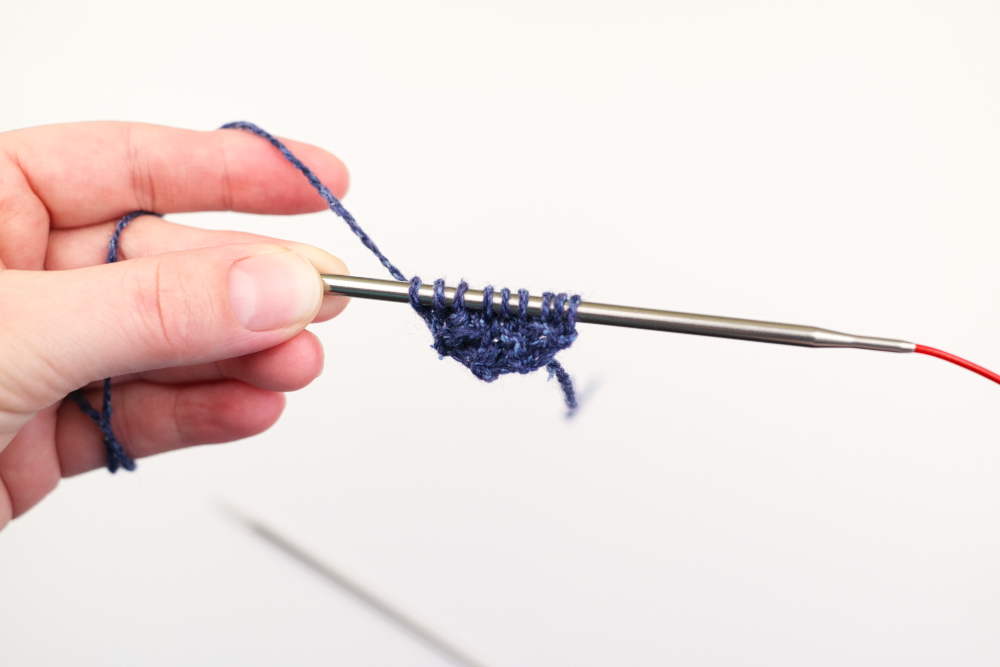
    Step 2: Pull a loop through.SAMSUNG CAMERA PICTURES

    Step 3: Remove the loop from the needle and pull out enough yarn to comfortably knit the next 2 rows. The excess length will be removed later so this does not need to be exact.SAMSUNG CAMERA PICTURES

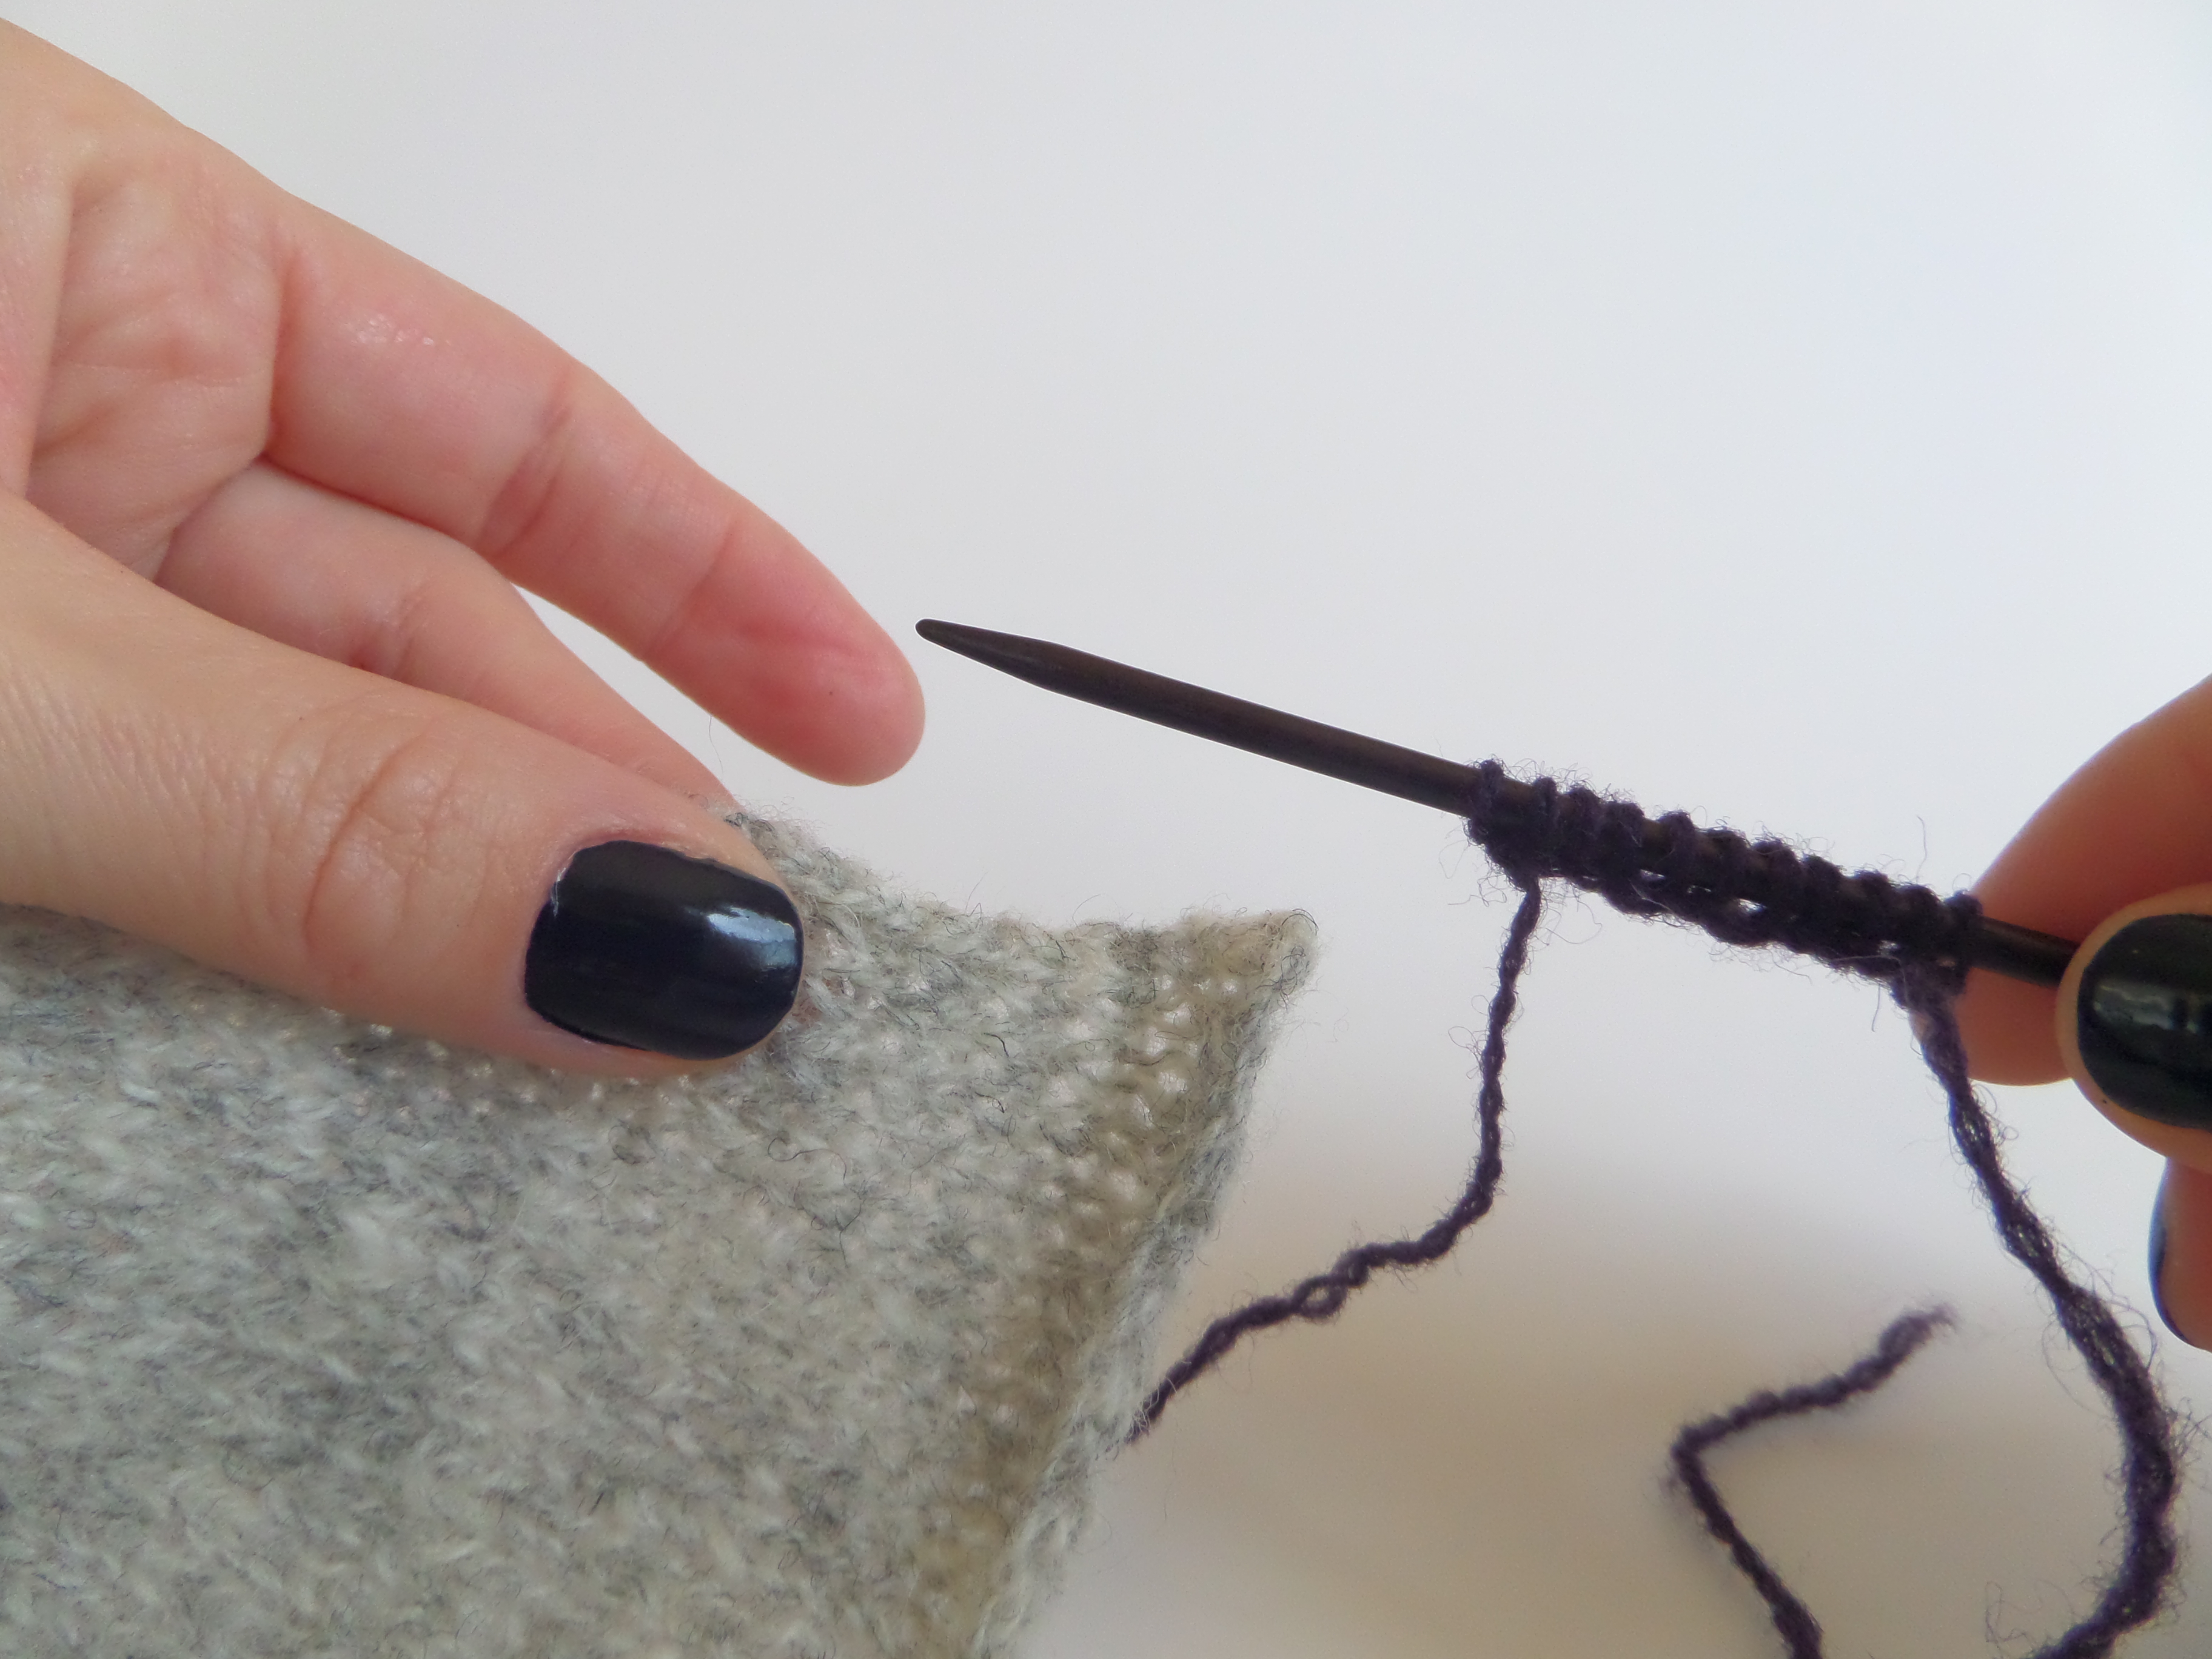
    Step 4: Work the first wrong-side row of the band with the bottom half of the loop.SAMSUNG CAMERA PICTURES

    Step 5: Work the second right-side row of the band with the top half of the loop and pull tight so the band is snugged up against the front.SAMSUNG CAMERA PICTURES

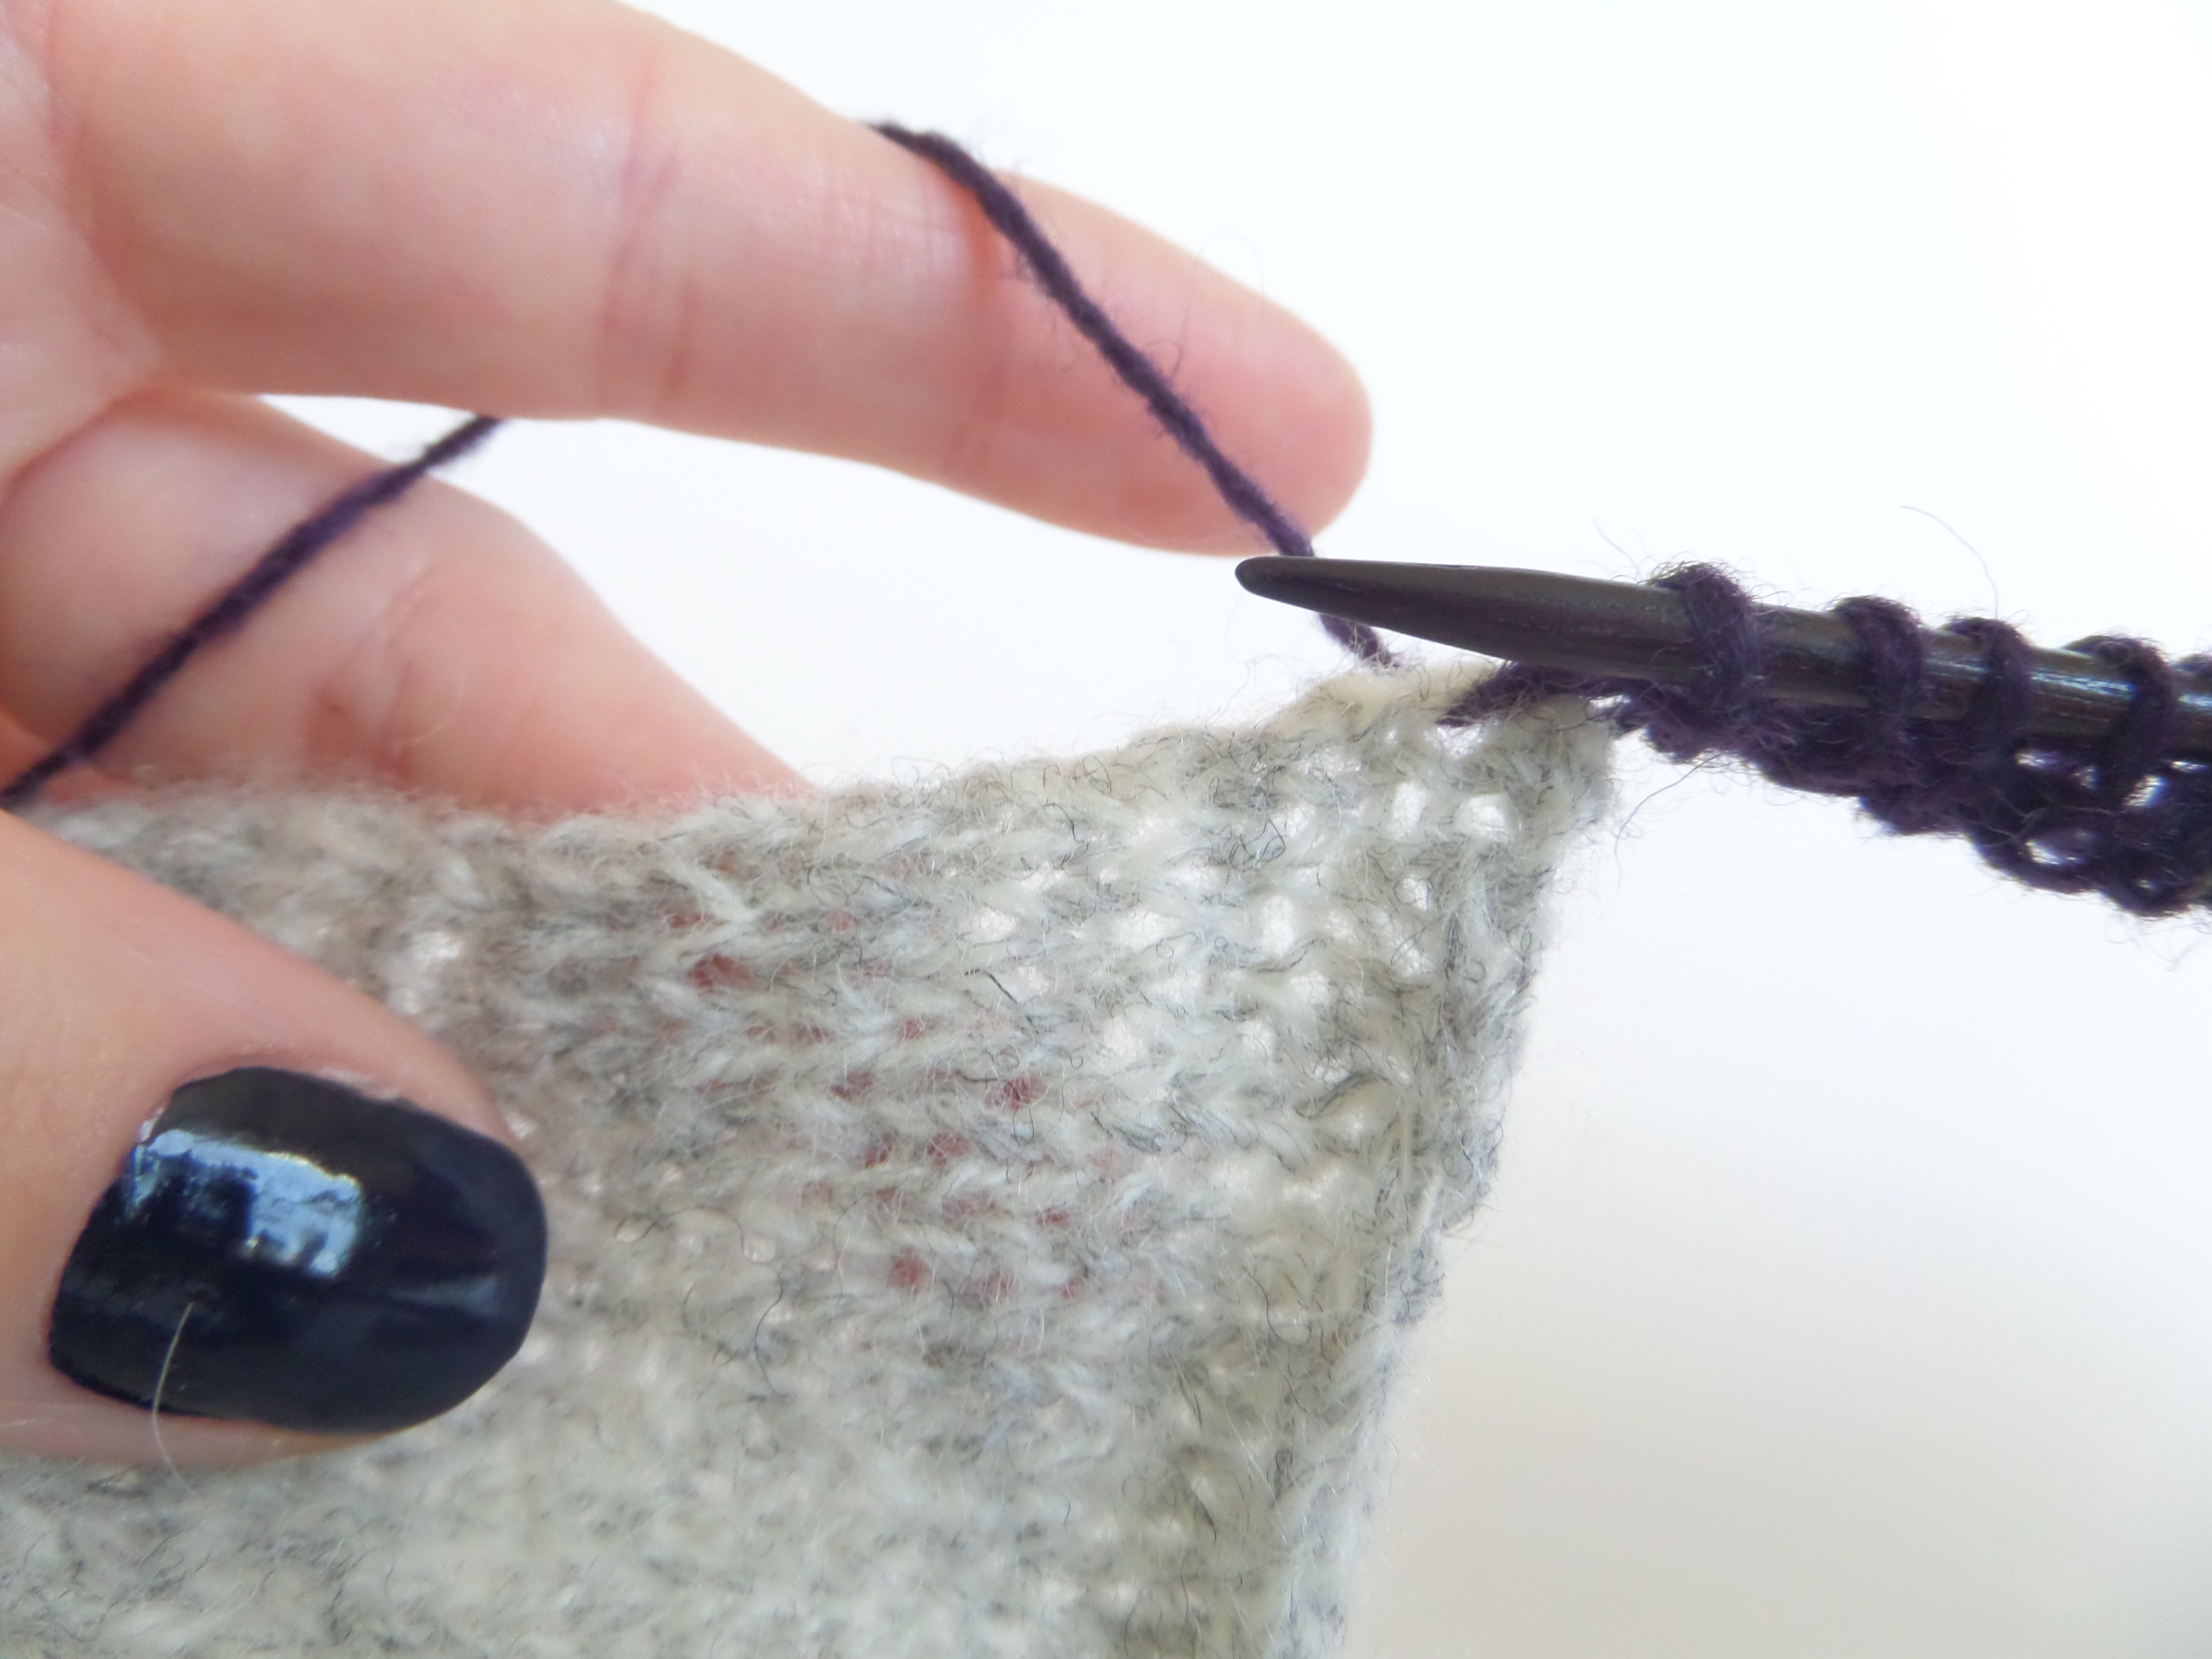
    Repeat steps 1 through 5 for the length of the fronts. Two rows are worked for every picked-up loop, so you will have to skip every second row on the sweater front for the band to have the same number of rows. If you are working a round neck cardigan, both bands can be worked first and continued into the neck band. For v-neck cardigans, the bands can continue around the neck edge to be joined at the back neck.

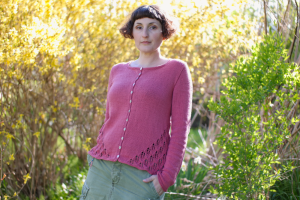
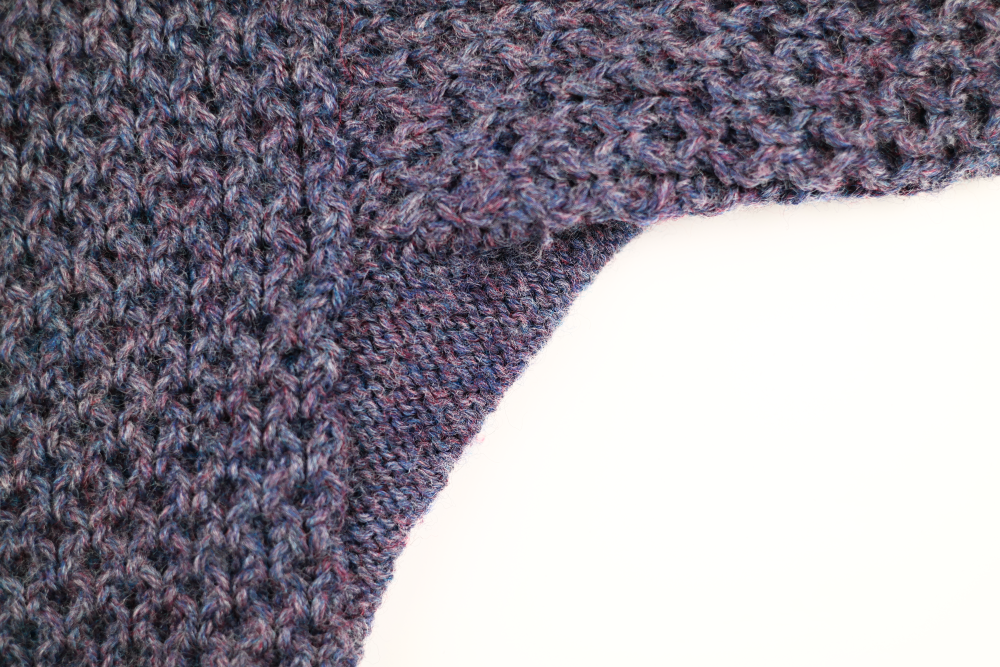
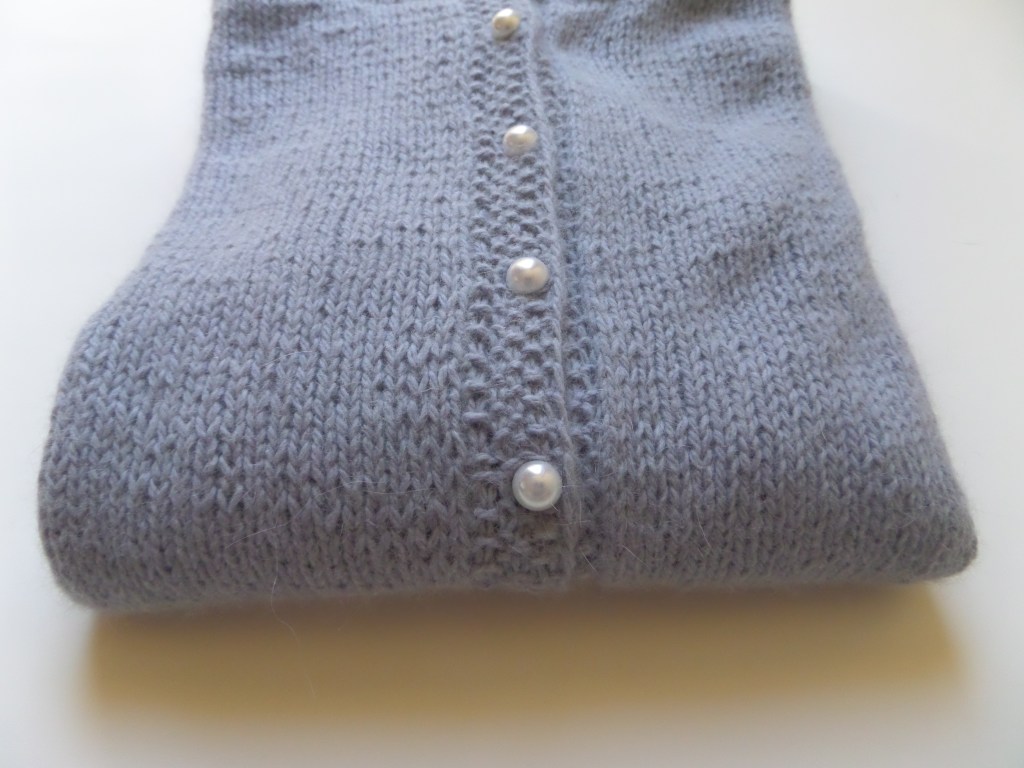
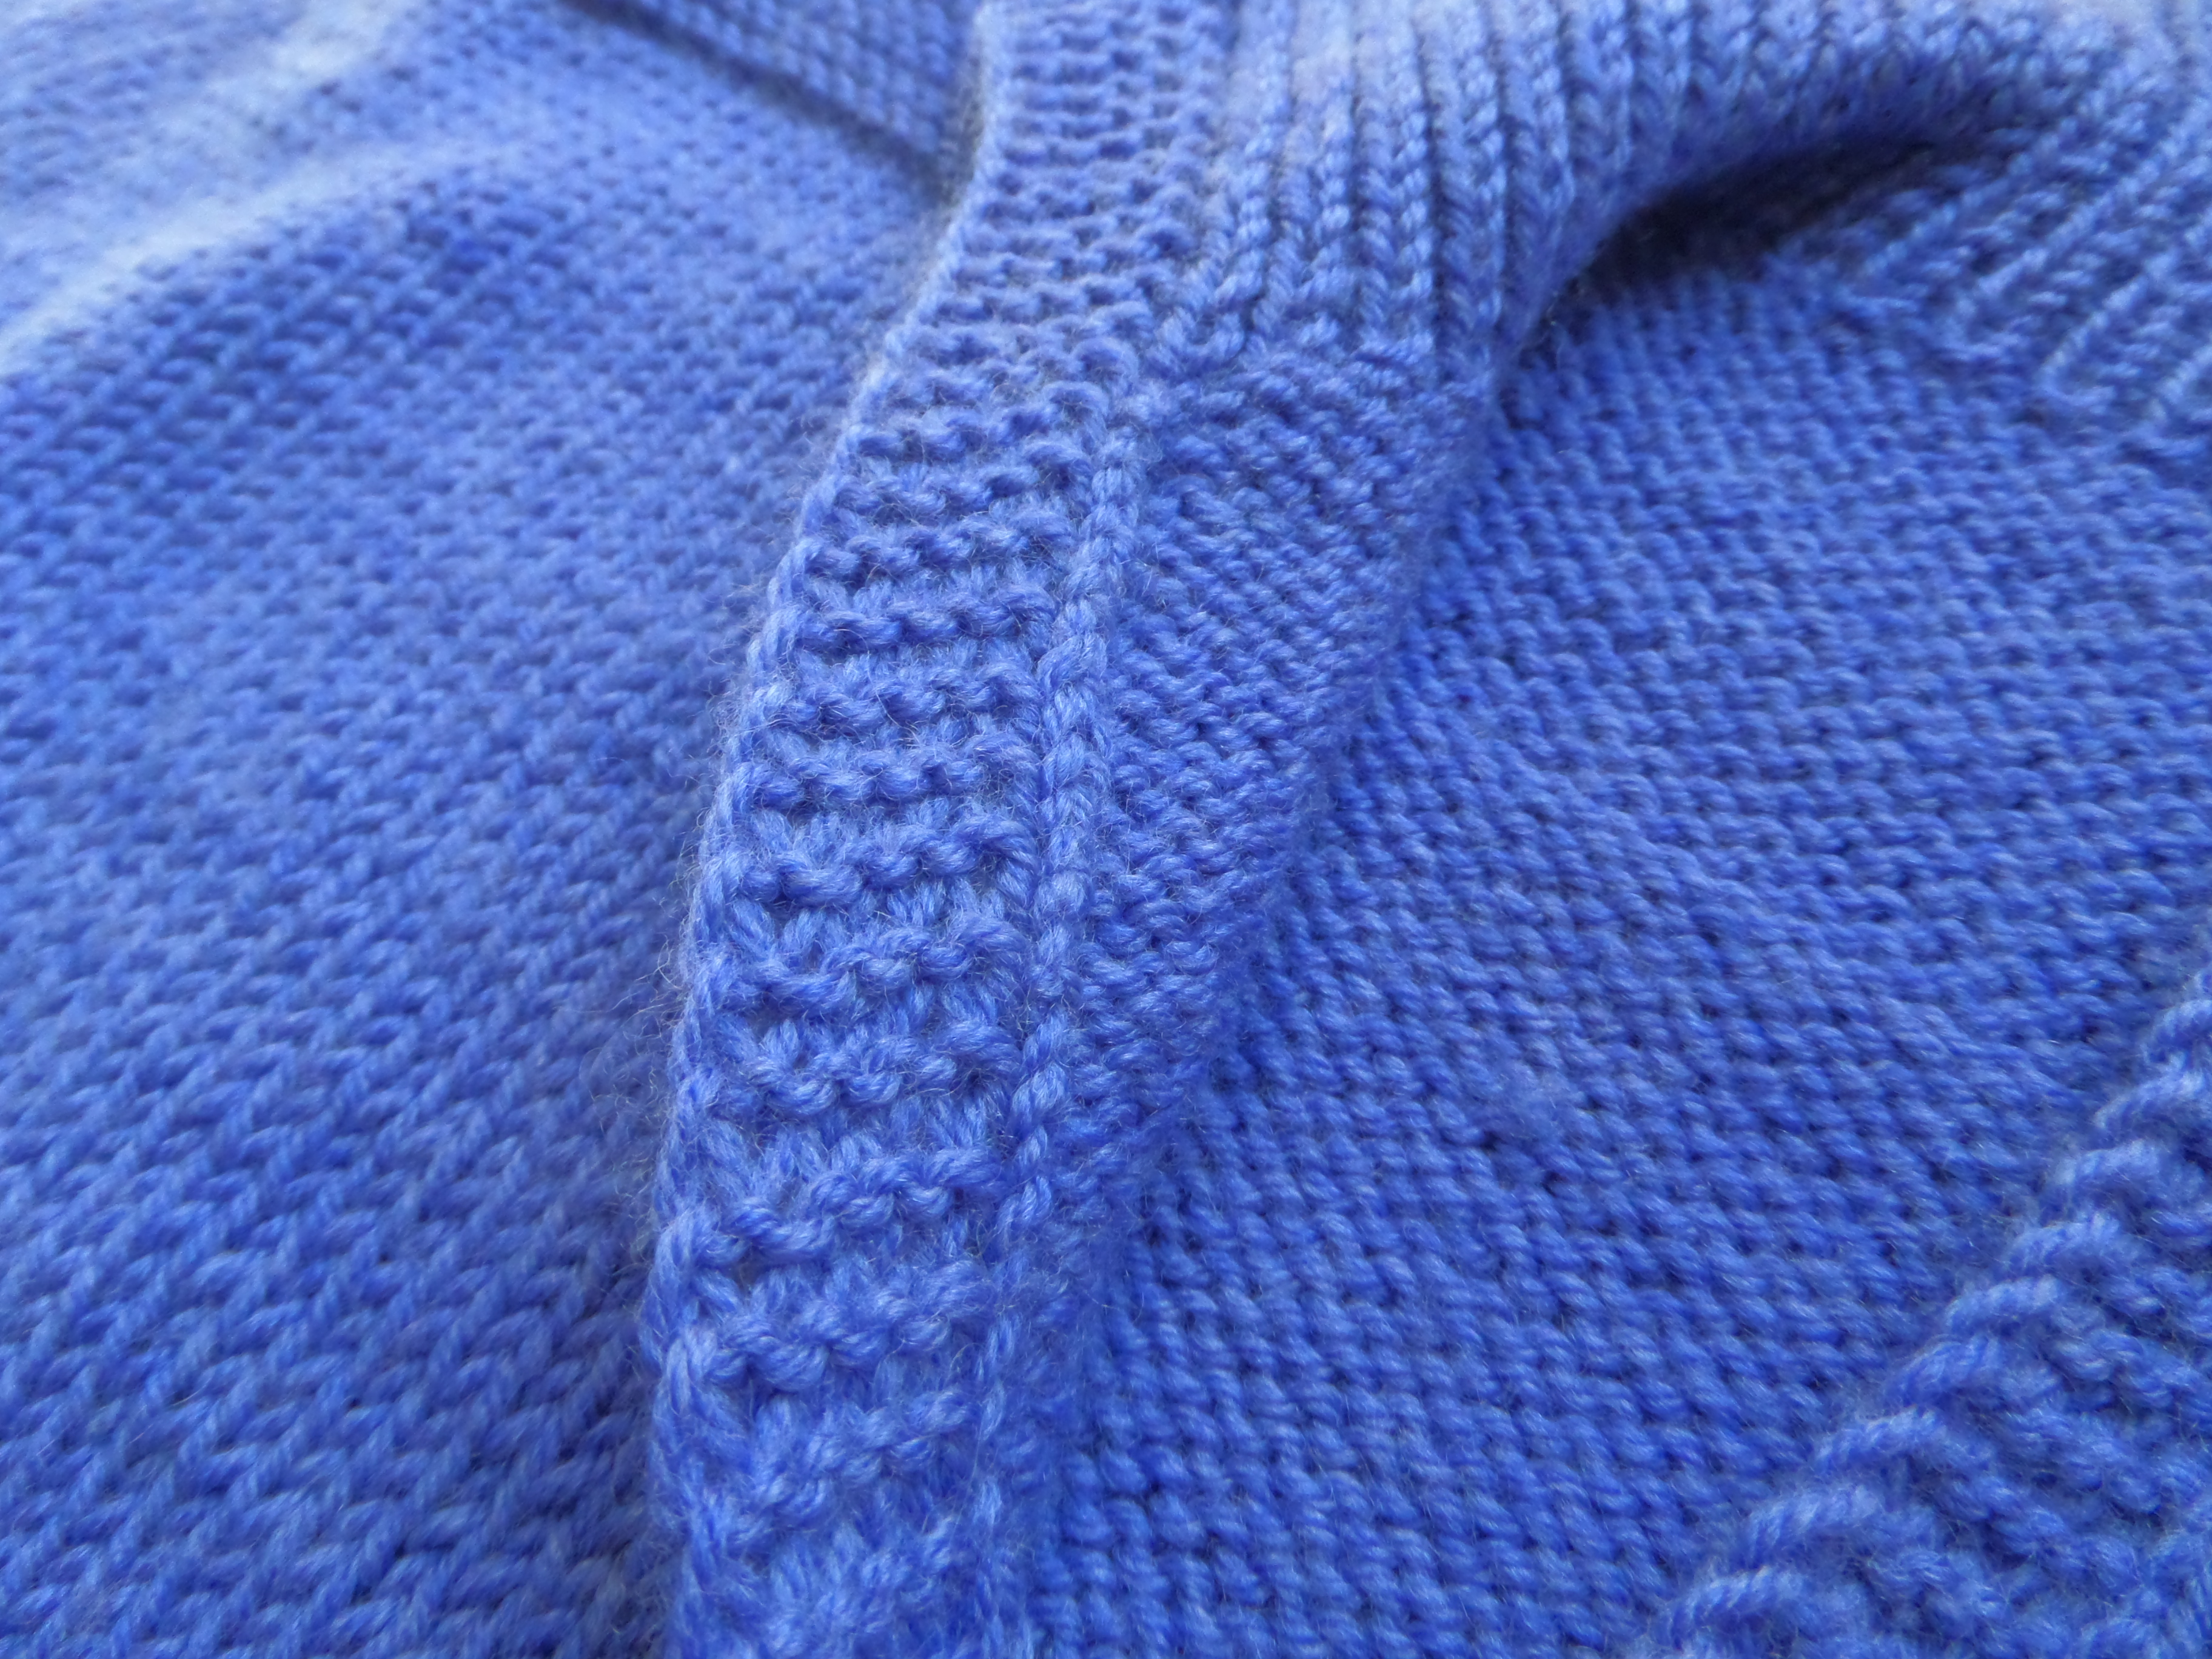
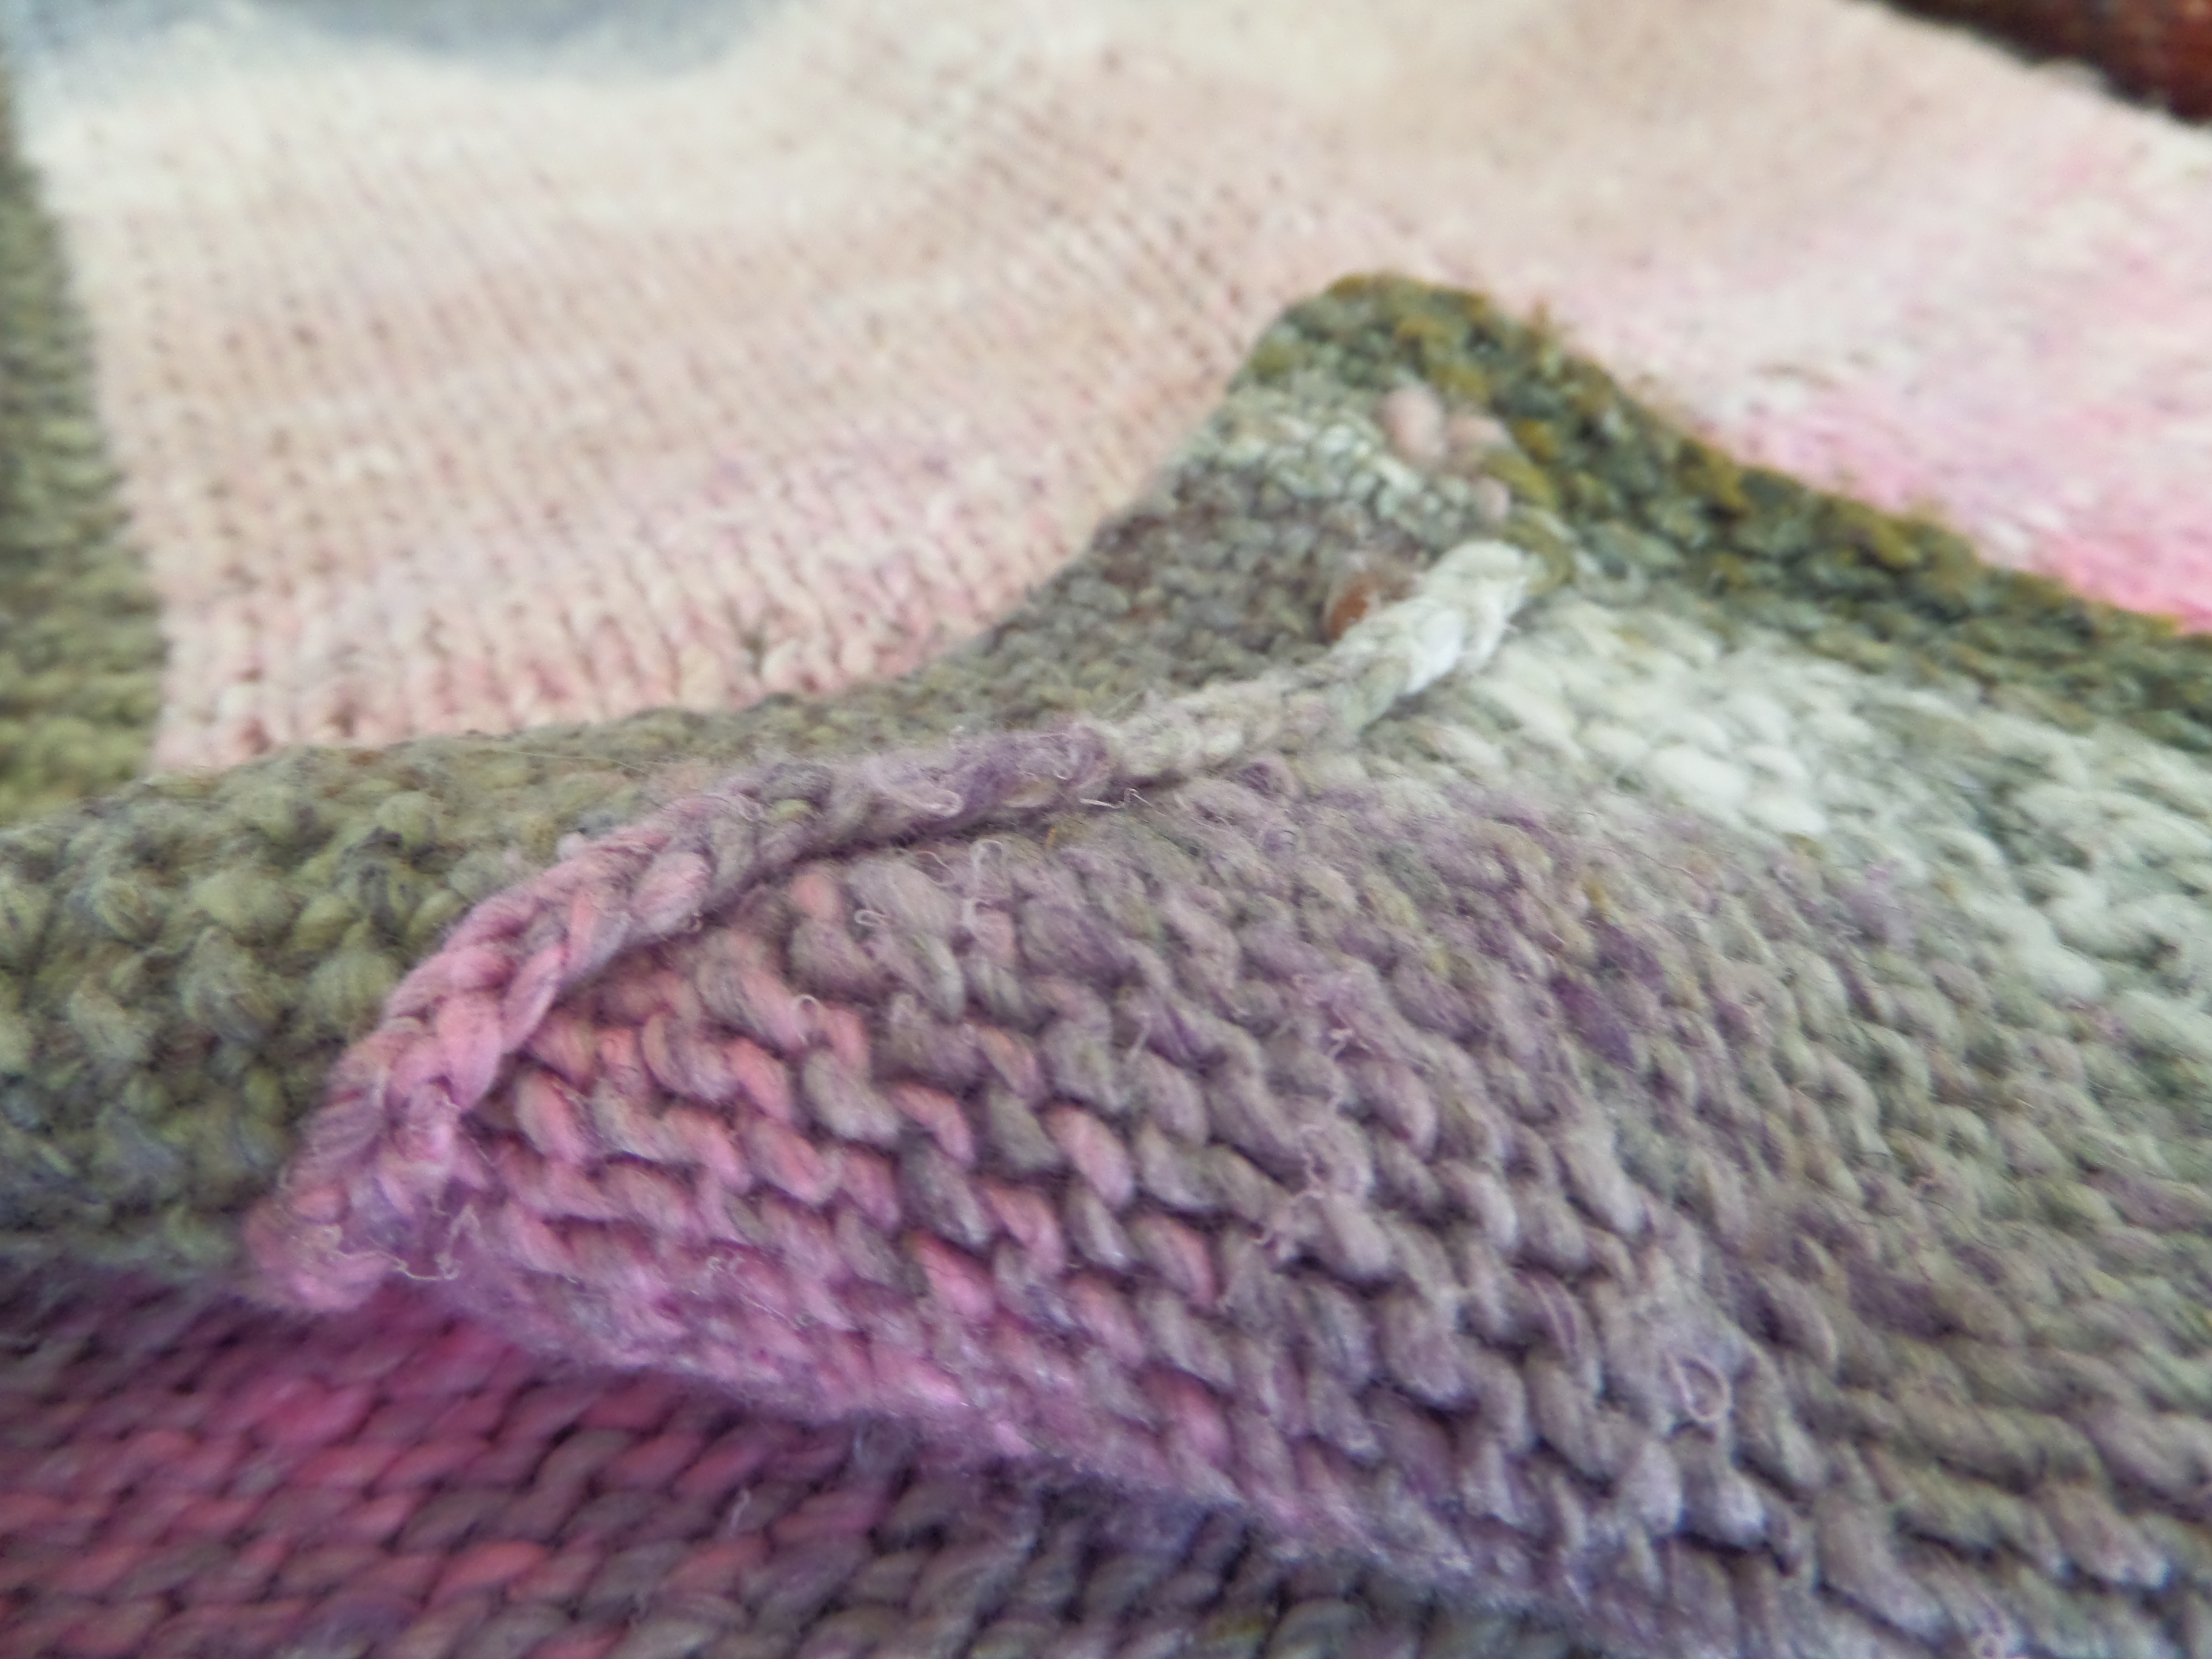
    Cardigans aren’t the only use for the side-to-side join! Anywhere you would would like to attach a parallel piece of knitting to an already finished piece this method will work. The cover photo and the photos below are examples of sweaters that I made using this technique.

    Garter stitch bands.
    Garter stitch bands.
    From the wrong side you can see hoe the band continues into the collar.
    The wrong side view, Here you can see how the band continues into the collar.
    Seed stitch bands.
    Seed stitch bands.
    The wrong side view.
    From the inside.
    SAMSUNG CAMERA PICTURES
    Knit 1, purl 1 ribbing seen from the right side on the left and the wrong side on the right.

    Let me know in the comments if you’ve seen this method before or if you’ve tried it yourself.

    Thank you for knitting!

  • Ease

    Ease

    What Is Ease?

    Ease is the term used to describe the difference between the size of a garment and the size of the body the garment is intended to fit. There are two types of ease used in garment design–wearing ease and design ease. Wearing ease is necessary for movement in places like the underarm and elbow. Whether the garment is designed to wear over other clothing or just undergarments will also help to determine how much wearing ease is needed. Design ease determines the shape and fit of a garment. A batwing sweater will have a lot of ease at the underarm and chest while a set-in sleeve sweater will usually have only a small amount of ease. In a bulky sweater the thickness of the fabric will take up some of the ease between the outer circumference of the sweater and the circumference of the body. Some garments can be worn with negative ease for a form-following fit because of the inherent stretch of knit fabric.

    Some general guidelines regarding ease and fit:

    • Very close fit – 0 to 2″/5 cm negative ease
    • Close fit – 0 to 2″/5 cm positive ease
    • Standard fit – 2 to 4″/5 to 10 cm positive ease
    • Loose fit – 4 to 6″/10 to 15 cm positive ease
    • Oversized fit- 6″/15 cm or more positive ease
    Augusta is a cocoon-style cardigan with a lot of design ease at the underarm.
    Kephren wearing the Spring Thaw Cardigan with zero ease
    The Spring Thaw Cardigan is a set-in sleeve sweater worn with zero ease at the bust.

    How To Determine Your Preferred Ease

    Ease is ultimately a matter of personal preference. Some people like to wear their sweaters with a lot of ease and others prefer no ease at all. The amount of ease suggested in a pattern is just a suggestion, based on a theoretical range of body sizes. Every knitter will not fit neatly into one of these sizes. When I am grading a knitting pattern I apply the same amount of intended ease to each size to maintain a consistent fit across the size range, but the amount of ease the garment is worn with is ultimately up to the knitter. Hand knitting is wonderfully customizable, and knitters can choose the amount of ease they prefer. An evenly graded size range, a schematic, and finished measurements will make it easier for knitters to achieve the fit they want.

    To determine how much ease you prefer, measure the width of a sweater that you like the fit of at the bust/chest and multiply the width by 2 to get the circumference. Then measure your body around the fullest part of your bust/chest. Subtract your body measurement from the sweater measurement. This is your preferred ease and corresponds to the suggested ease given in a pattern. If a pattern suggests 6″ to 8″/15 to 20 cm of ease but you know from your measurements that you prefer 2″/5 cm of ease, you may want to knit one size smaller than suggested for your chest measurement.

    It’s also important to get the right amount of ease at the upper arm. Measure the width of your sweater’s sleeve just below the underarm and multiply by 2 to get the circumference, then measure around your arm just below the underarm. Subtract your arm measurement from the sweater measurement to determine how much ease you like in your sleeves. Now look at the upper arm circumference of the pattern size you chose. If the pattern’s sleeve circumference is the same as your well-fitting sweater, that’s perfect! If the upper sleeve circumference is different from your preferred sleeve circumference you may want to choose a different size or adjust the circumference of the sleeve. Negative ease in the sleeves will make them ill-fitting and uncomfortable.

    The Lake Geneva Sweater shown in size 35 1/4″/89.5 cm and worn with 2″/5 cm negative ease.
    The Lake Geneva Sweater shown in size 43 3/4″/111 cm and worn with 6″/15 cm positive ease.

    Ease and Bust Size

    You can see from my two versions of the Lake Geneva Sweater above that the same garment can look very different depending on the amount of ease it’s worn with. Ease is calculated at the full bust, so the size of your bust relative to the rest of your torso will also affect the amount of ease in your garment. My high bust measurement (measured around my chest just below the underarms) is 34 1/2″/87.5 cm and my full bust is 38″/96.5 cm. The smaller version, worn with negative ease at the bust, still has some positive ease in the sleeves and body because my full bust is 3 1/2″/9 cm larger than my high bust, and most standard women’s size charts assume a B cup, or a full bust 2″/5 cm larger than your high bust. If you wear a C or D cup, or your full bust is 3″ to 4″/7.5 to 10 cm larger than your high bust, you may need less ease at the full bust to achieve your preferred fit everywhere else. If your cup size is larger than DD or 5″/12.5 cm larger than your high bust, you may wish to make a smaller size than recommended to fit the rest of your body and add extra fabric at the bust only with additional rows or stitches in the front of the garment.

    The Relative Ease Fallacy

    There have been some discussions recently about whether larger people need to have more ease in their garments to achieve the same look and fit as smaller people wearing the same type of garment. I think this idea is based on false assumptions and a misunderstanding of geometry. Remember, ease is the difference between the body measurement and the garment measurement. If the same amount of ease is applied to each size in the range, the difference between the body and garment measurements will remain the same.

    Two pairs of circles demonstrating how ease remains the same when applied consistently. A 34"/86.5 cm circle within a 38"/96.5 cm circle has a 0.6"/1.6 cm radius difference, and a 54"/137 cm circle within a 58"/147 cm circle also has a 0.6"/1.6 cm radius difference.

    The two pairs of circles above illustrate what happens when the same amount of ease is applied to two different size garments. Imagine that the inner circle is the body and the outer circle is the garment. I calculated the radius of each circle in the pair and subtracted the radius of the smaller circle from the larger one. The difference between the outer circle and the inner circle is the ease. It is not relative to the size of the circles and stays exactly the same as long as the difference in the circumferences stays the same. This is why relative ease doesn’t work. You will not achieve the same fit by applying different amounts of ease across the size range. Notice also that even though the outer circle is 4″/10 cm larger than the inner circle, the difference between the radii is only about 1/2″/1.5 cm.

    How much ease do you prefer? Do you usually follow a design’s suggested ease? Tell us about it in the comments!

    Resources

  • The Amazing Invisible Provisional Cast On and Its Many Uses

    The Amazing Invisible Provisional Cast On and Its Many Uses

    One of my favorite cast-on methods is one you can’t see. The Invisible Provisional Cast On can be worked with a bit of smooth waste yarn, a spare circular needle or cord, or sometimes just one circular needle. It allows the knitter to cast on stitches and knit in one direction, then come back to the cast-on stitches and knit in the other direction without creating a visible seam or change in the fabric. It is virtually undetectable in most cases and indispensable for seamless knitting. While it’s not an all-purpose cast-on, there are a few special applications that I find this cast-on method absolutely perfect for. I’d love to know if you are familiar with this cast on and what you use it for. Tell me in the comments!

    Top-Down Underarms

    For this method I use the same waste yarn that I use to hold my sleeve stitches to cast on the underarm stitches. When I go back to pick up and finish my sleeves the provisional cast-on stitches can be placed on the needle along with the held stitches. I like to start my sleeves at one side of the underarm cast on, but you can start in the middle if you want to. There will be one stitch more than there was cast on for the body. I like to pick up a second extra stitch on the opposite side from where I started, then I decrease both of these stitches to close the gaps usually found there. Pay attention to the stitch mount because every other stitch will have its leading leg on the back of the needle, and be sure to work these stitches through the back loop so they won’t twist. I have a step-by-step tutorial in this blog post.

    The middle row of purl stitches in this underarm was cast on using the Invisible Cast On

    Toe-Up Socks

    My favorite way to make socks is from the toe up, two-at-a-time, on a circular needle. After trying other methods, I decided the Invisible Provisional Cast On is the perfect method to achieve neat and even stitches at start of the toe. For this method, I fold my circular needle in half and use the cord in place of waste yarn. A slipknot is placed on the cord and then the cast on is worked over the needle and the cord. I like to knit my socks two-at-a-time, so after the first sock is cast on I place a twisted loop on the needle to hold those stitches in place and cast on the second sock. To join in the round I turn and knit across the stitches I just cast onto the needle, turn, and work across on the provisionally cast-on stitches.

    One sock is cast onto the needle with the provisional stitches held by the cord.
    Place a twisted loop on the needle to hold the stitches in place.
    Both socks are cast on and ready to work in rounds.
    The cast on is invisible!

    Garter Tab Cast On

    To start a garter tab with the Invisible Provisional Cast On I fold my circular needle in half and cast on 3 stitches using the cord to hold the provisional stitches. Then I work back and forth in garter stitch until my tab is long enough. The first row after casting on and the last row before picking up stitches should both be right-side rows. After you’ve picked up the correct number of stitches from the side edge of the garter tab you can just slide the provisionally cast-on stitches up to the needle tip, drop the slipknot, and work the stitches paying attention to the stitch mount so they don’t get twisted.

    This shawl starts with a garter tab using the Invisible Cast On
    Provisionally cast on 3 stitches
    Turn and start knitting back and forth
    Keep knitting until the garter tab is the right length
    pick up stitches along the side edge
    drop the slipknot and knit the 3 provisionally cast on stitches

    The Moebius Cast On

    Cat Bordhi uses the Invisible Cast On to work a Moebius from the center out in her book A Treasury Of Magical Knititng and Craftsy class. The same provisonal cast on is used with the cord holding the provisional stitches, but instead of folding the cord in half the needle is looped back over itself to create a Moebius ring.

    Thank you for knitting!

    Resources

    Knit Picks Traditional Provisional Cast On (photo tutorial and video)

    Suzanne Bryan’s video demonstrating the Invisible Cast On over a spare circular needle

    My Instagram story showing how I use the Invisible Cast On for top-down underarms

  • Lucky Gansey

    Lucky Gansey

    Have you seen the new Crossings book from Knit Picks? It’s a collection of 12 sweaters and wraps all showcasing classic cables. My contribution to the book is the Lucky Gansey, an all-over cabled fisherman style sweater worked from the top down.

    Lucky Gansey shoulder shaping


    The sweater starts with a cable at the back neck which spans the saddle shoulders and continues down the sleeves. Shoulder shaping is worked into the saddles to keep the drop shoulders from becoming too voluminous or droopy.


    A side view of the sweater showing the underarm gusset


    The sweater is worked flat to the underarms, then the gusset stitches are cast on and the body is worked in the round to the hem. Underarm gussets are a classic element of fisher Ganseys, allowing sweaters to be form fitting without being restrictive.


    The cables at the front


    The Lucky Gansey gets its name from the cables I chose. The cables adorning the front and back of the sweater are knitted representations of horseshoes, wishbones, X’s and O’s, and honeycomb, all symbols of good luck.


    The pattern calls for Knit picks Wool of the Andes, an affordable, worsted weight, 100% wool yarn that is available in an expansive range of colors. The fisher Gansey shape was historically worn by men, and with a size range from 34″ to 55.25″ around the chest, this sweater could easily be made to fit a man or woman.

    Are you a cable knitter? Do you have your eye on one of the designs in this book? Tell me about it in the comments!

    Thank you for knitting!


  • Compass Points Pullover

    Compass Points Pullover

    The Compass Points Pullover was published in the Fall/Winter 2018 issue of knit.wear magazine. It’s a bulky cabled sweater featuring raglan shoulder shaping, a thick and cozy funnel neck, and a long tapered waist. Cascade’s Boliviana Bulky yarn makes the knitting speed by, so you’ll be dressed in a new, warm, winter sweater in no time at all!

    The pullover is worked from the top down beginning at the neck. After a few tries incorporating neck shaping into the cable patterns and raglan shaping, I decided to save the neck shaping for last, so all of the neck stitches are cast on at once and the body is worked in the round to the hem. The raglan increases are worked before and after a column of Stockinette stitch, which continues down the sides of the sweater and highlights the waist shaping.

    When the body of the sweater is finished sleeve stitches are picked up and worked in the round to the ribbed cuffs. The cable pattern starts at the neck and continues down the sleeve to blend seamlessly into the cuff ribbing.

    The funnel neck is picked up last and short rows are used to raise the back neck. I had originally planned to make the funnel neck shorter and a single thickness, but when it was finished it was just too floppy and didn’t look the way I wanted it to, so I made the neck band twice as long, folded it over, and sewed it to the inside. Perfect! The funnel neck is thick and cozy without hugging your neck in an annoying way.

    The Fall/Winter issue of knit.wear magazine is available now in print and digital formats.

    Thank you for knitting!

  • The Bristol Raglan and Holiday Sale!

    The Bristol Raglan and Holiday Sale!

    I’ve just added the Bristol Raglan to my Ravelry pattern store. This pattern was first published in the Spring 2017 issue of Interweave Knits magazine. I’ve revised the pattern to include written directions along with the cable charts, and I’ve changed the directions slightly to make it easier to follow the raglan shaping directions and cable patterns at the same time. This pattern and all of my other independently published patterns are 30% off the regular price now through November 27, 2018. You can see all the patterns on sale here. No code needed, just add the patterns to your cart and the discount will be applied automatically at checkout.

    The Bristol Raglan is a top-down seamless pullover, worked mostly in the round. The neck is cast on first, and worked flat to create a lower front neck line, then the piece is joined and worked in the round to the underarms. Simple cables adorn each raglan seam line, and stop just before the underarm separation.

    After the body and sleeves are separated, the body of the pullover is worked in stripes to the split hem. The front and back are separated, and the back hem is worked longer than the front. A little cable detail keeps the hem neat where it splits at the sides, and a purled phony seam on each side hides the jog from the color changes.

    Three-quarter length sleeves are worked in the round from the held sleeve stitches and a provisional cast on at the underarm, but working from the top down means you can easily change the length.The pattern is available in five sizes, from 37″ to 50 1/2″ bust sizes, and it’s worked in a worsted weight yarn. You can see all the details on the pattern page.

    Thank you for knitting!

  • Lake Geneva Sweater

    Lake Geneva Sweater

    The Lake Geneva Sweater is my design for the Winter issue of Knitscene. It’s a top-down, drop shoulder, V-neck sweater, made entirely without seams. The marled effect is created by holding two strands of fingering weight yarn together. For the sample I used Cascade Yarns Sorata in Charcoal and Silver. I love the simplicity of this design and I think it will be a fun and easy knit for both beginner and experienced sweater knitters. Worked at a worsted weight gauge, this sweater goes fast!

    Copyright Knitscene/Harper Point Photography


    One of my favorite features of this design is the way the shoulders are shaped. Drop shoulders can get a little droopy (think of big shouldered sweaters from the 1980s) unless they are tapered toward the sleeve, and that is usually achieved by working short rows. For this design I did something even easier; the shoulders are worked in garter stitch and the taper is created by gradually working more stitches in stockinette stitch until only the armhole border is worked in garter stitch. The shorter row gauge of garter stitch makes the length at the armhole shorter than at the neck edge.

    Copyright Knitscene/Harper Point Photography


    The V-neck shaping couldn’t be simpler from the top down. There is no need to cast on stitches for the front neck as you would for a round neck, instead increases are worked at the neck edge until there are enough stitches to join the fronts and work in the round. The V-neck shaping was carefully planned so that it doesn’t start until the garter stitch shoulders are complete, and the fronts are joined at the base of the neck on the same row the front and back are joined at the armhole. I’m not a fan of “at the same time” instructions, so I avoid them whenever possible!

    Copyright Knitscene/Harper Point Photography


    The body of the pullover is worked straight to the hem, and the sleeves are picked up and worked in the round from the armholes, so after doing the hard work of shaping the neck and shoulders it’s all mindless stockinette. There is a little column of garter stitches on each side, which acts as a faux seam and makes a fun detail. It is also repeated on the sleeves at the underarm. Ribbed cuffs and hem complete the sweater adding to the casual, comfortable feel.

    The Winter issue of Knitscene is available in the Interweave Store, and at bookstores and yarn shops all over. Thank you for knitting!